A More Advanced Example
In this example we'll create an automate method that adds a custom attribute to a VM. We'll launch the automation instance from a button, and we'll include a dialog to prompt for the text to add.
Creating the Service Dialog
The first thing we must do is create a Service Dialog to be displayed when our custom button is clicked.
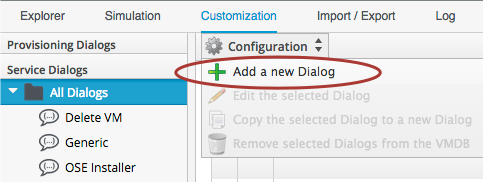
Navigate to Automate -> Customization, select Service Dialogs in the accordion, highlight All Dialogs, then select Configuration -> Add a new Dialog (don't click the Add button yet...)
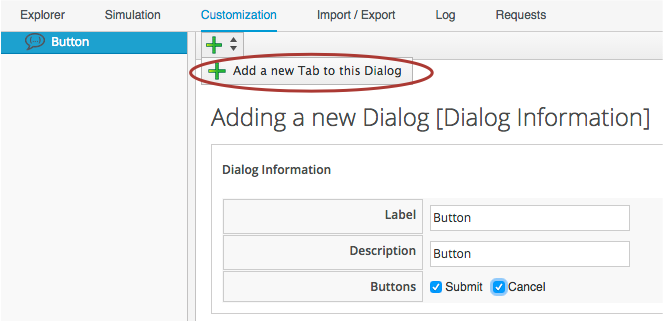
Give the Dialog a Label and Description of Button, check the Submit and Cancel options, and click + -> Add a new Tab to this Dialog (don't click the Add button yet...)
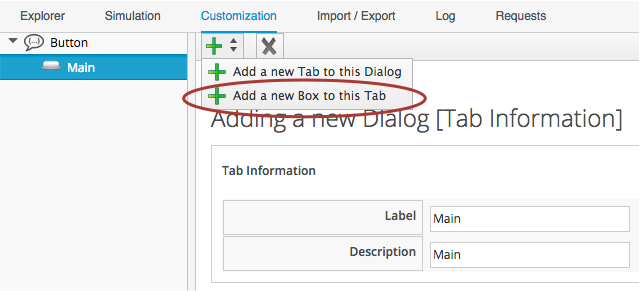
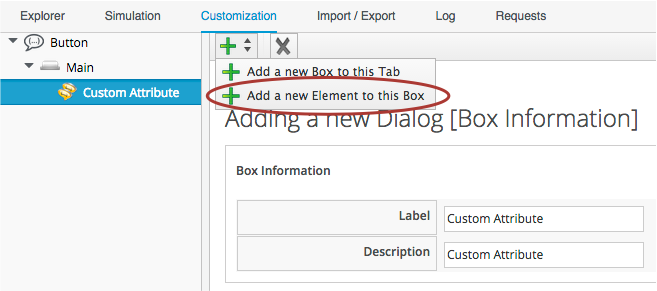
Give the tab a Label and Description of Main, and click + -> Add a new Box to this Tab (don't click the Add button yet...)
Give the box a Label and Description of Custom Attribute, and click + -> Add a new Element to this Box (don't click the Add button yet...)
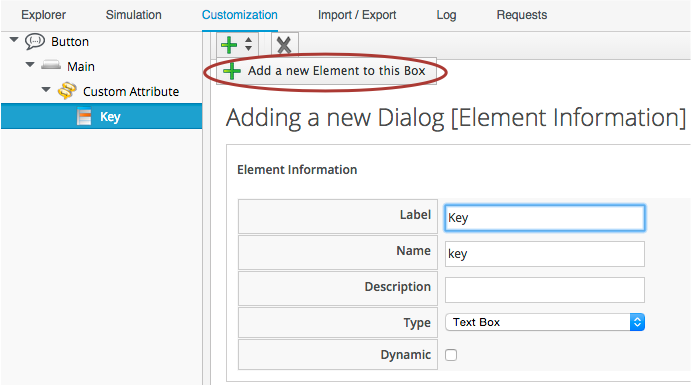
Give the new Element the Label of Key, the Name of key, and a Type of Text Box. Leave the other values as default (don't click the Add button yet...)
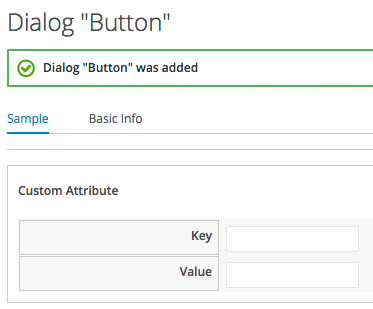
Click + -> Add a new Element to this Box to create a second element with the Label of Value, the Name of value, and a Type of Text Box. Leave the other values as default, and now, finally click the Add button.
Creating the Instance and Method
Create a new Instance in our Methods Class just as we did before, called AddCustomAttribute. Leave the password, servername and username schema fields blank, but add the value add_custom_attribute in the execute field.
Create a new Method in our Methods Class as we did before, called add_custom_attribute. Paste the following into the Data box:
$evm.log(:info, "add_custom_attribute started")
#
# Get the VM object
#
vm = $evm.root['vm']
#
# Get the dialog values
#
key   = $evm.root['dialog_key']
value = $evm.root['dialog_value']
#
# Set the custom attribute
#
vm.custom_set(key, value)
exit MIQ_OK
Values entered into a dialog box are available to our method through $evm.root. The Automation Engine prefixes the dialog element names with "dialog_", so the values that we want to read are $evm.root['dialog_key'] and $evm.root['dialog_value'].
Create the /System Entry Point
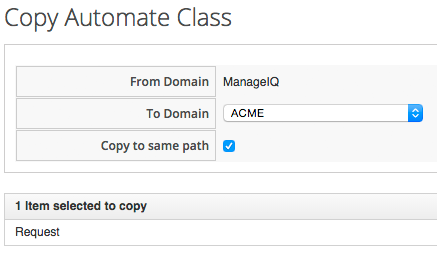
To illustrate an alternative way of calling an Instance, we're going to be creating our own entry point directly in the /System/ Namespace, rather than redirecting through Call_Instance as before. First we must copy the ManageIQ/System/Request Class into our own Domain:
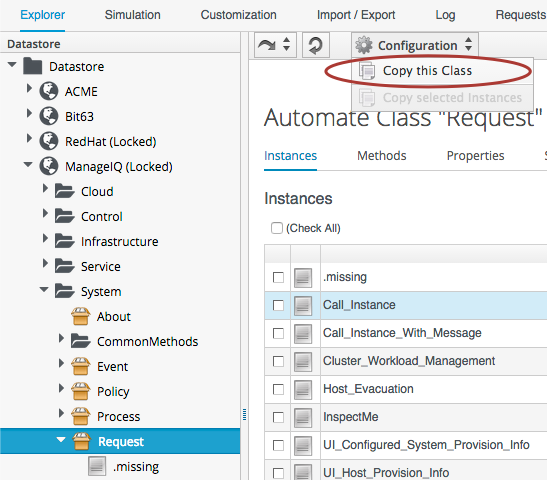
Copy the class into the ACME Domain, to the same path:
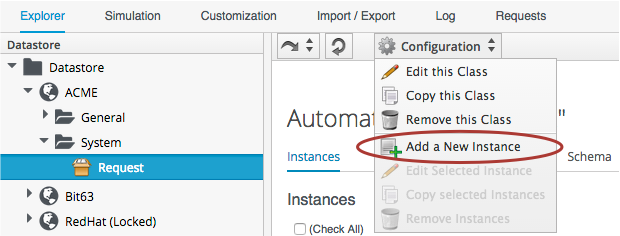
Now we have to create a new Instance of the Class:
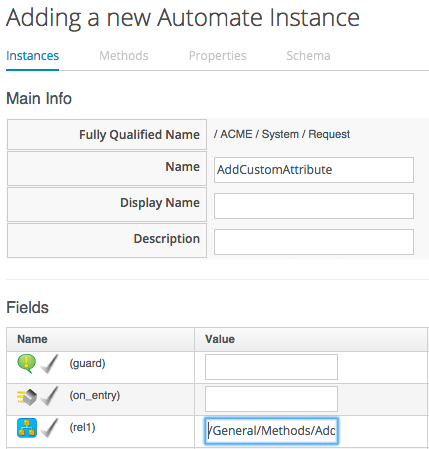
Enter /General/Methods/AddCustomAttribute into the rel1 field:
Creating the Button
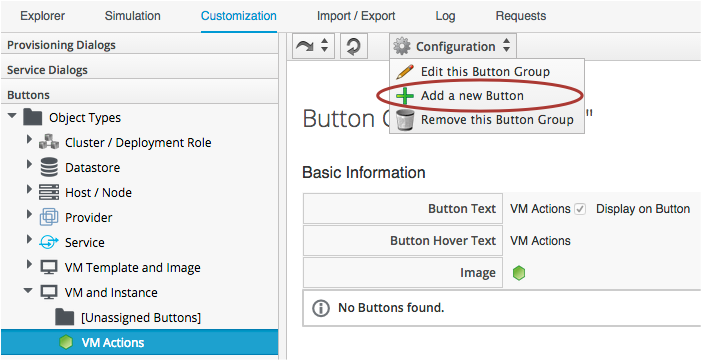
Navigate to Automate -> Customization, select Buttons in the accordion, highlight Object Types -> VM and Instance, then select Configuration -> Add a new Button Group:
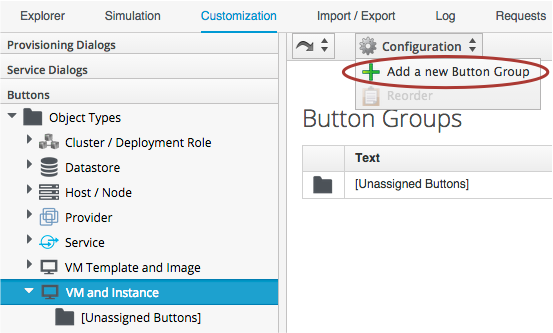
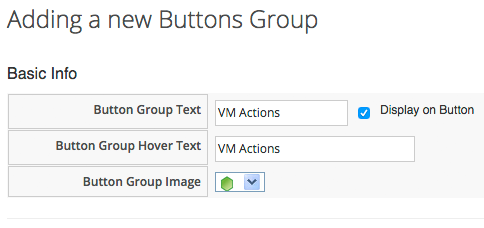
Create a Button Group called VM Actions, select a Button Group Image:
Click the Add button. Now highlight this new VM Actions button group in the accordion, and select Configuration -> Add a new Button:
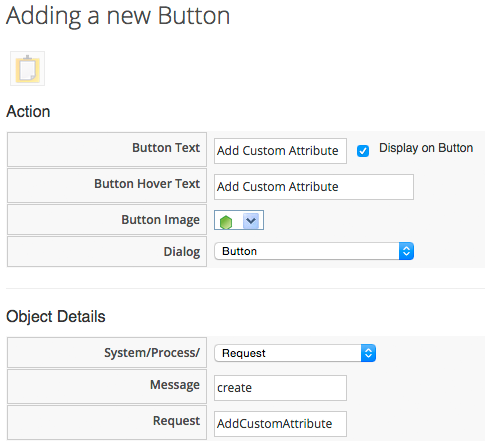
Specify a Button and Hover Text of Add Custom Attribute, select a suitable button image, and pick our new Button Dialog from the drop-down list:
Running the Instance
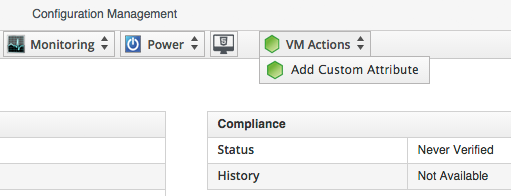
If we navigate to a VM and examine its details, we should see our new button group and button:
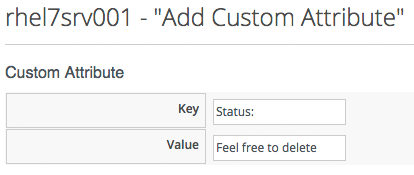
If we click on the Add Custom Attribute button we should be presented with our dialog:
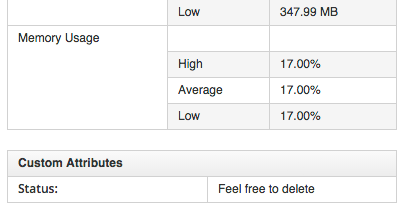
Enter some text and click Submit, wait a few seconds, and we should see the new custom attribute displayed at the botton of the VM details pane: