Writing and Running Our Own Automation Scripts
Let’s jump right in and start writing our first automation script. In time-honoured fashion we’ll write "Hello, World!" to the Automate logfile.
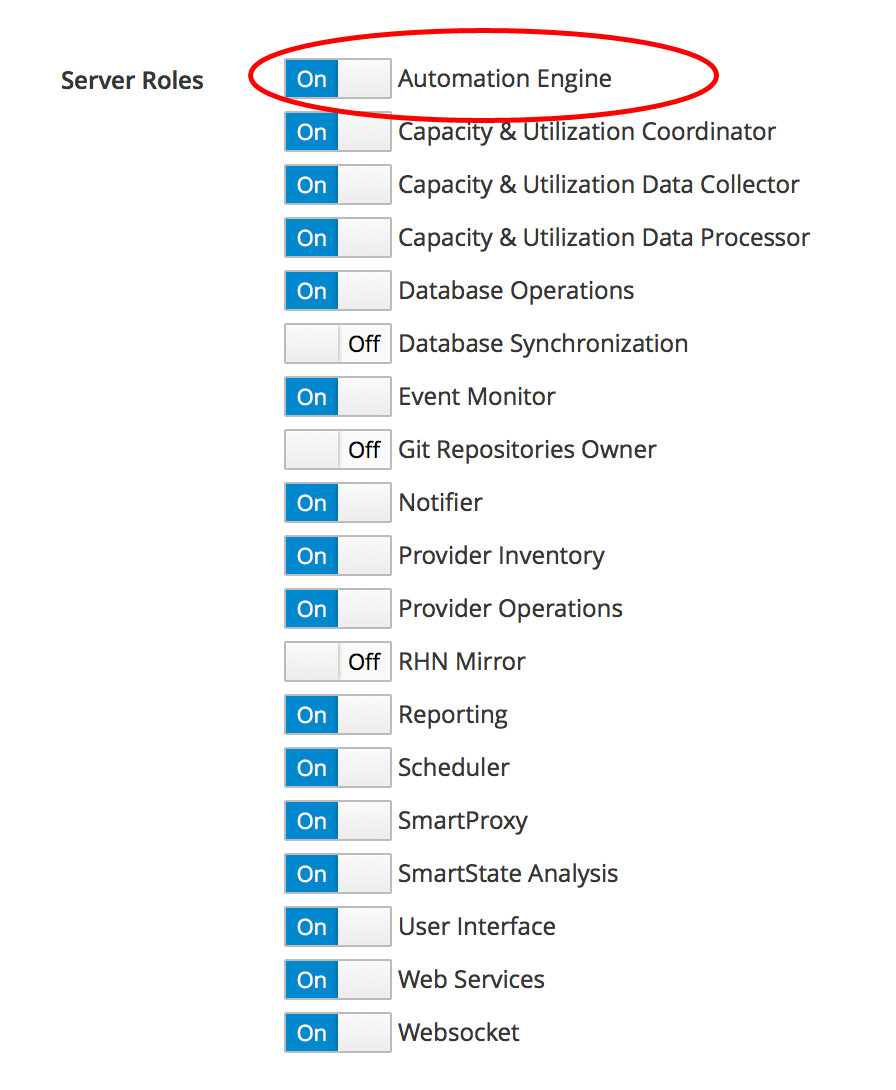
Before we do anything we need to ensure that the Automation Engine server role is ticked on our ManageIQ appliance. We do this from the Configure → Configuration menu, selecting the ManageIQ server in the Settings accordion (see Setting the Automation Engine server role).
|
Tip
|
The Automation Engine server role is now enabled by default in CloudForms 4.0 (ManageIQ Capablanca) and later, but it’s still worthwhile to check that this role is set on our ManageIQ appliance. |
Figure 1. Setting the Automation Engine server role
Creating the Environment
Before we create our first automation script, we need to put some things in place. We’ll begin by adding a new domain called ACME. We’ll add all of our automation code into this new domain.
Adding a New Domain
In the Automate Explorer, highlight the Datastore icon, and click Configuration → Add a New Domain (see Adding a new domain).
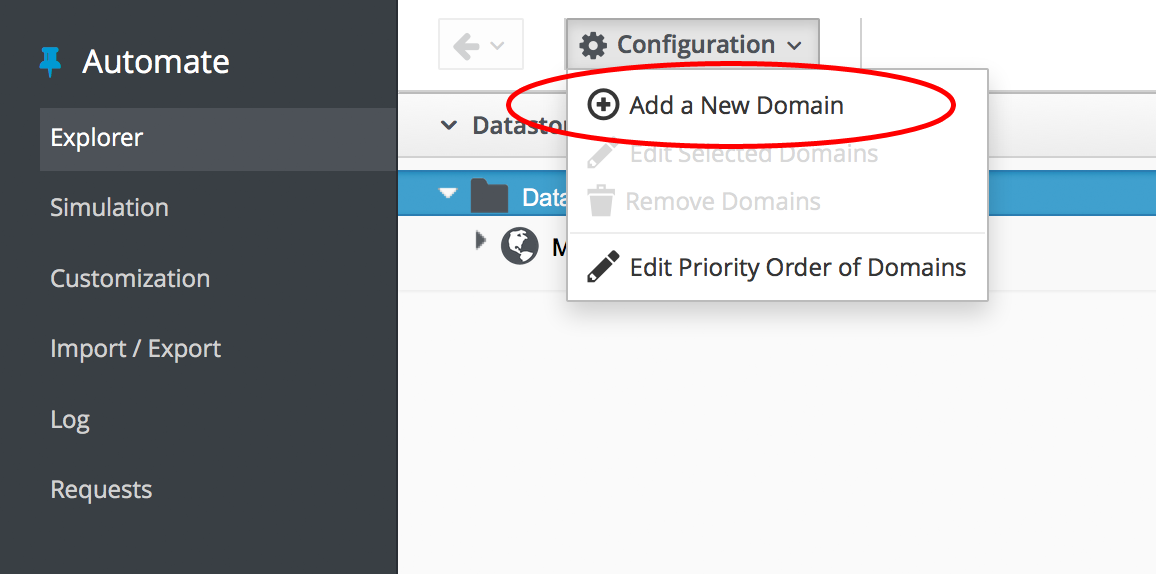
Figure 2. Adding a new domain
We’ll give the domain the Name ACME, the Description ACME Corp., and ensure the Enabled checkbox is selected.
Adding a Namespace
Now we’ll add a namespace into this domain, called General. Highlight the ACME domain icon in the sidebar, and click Configuration → Add a New Namespace (see Adding a new namespace).
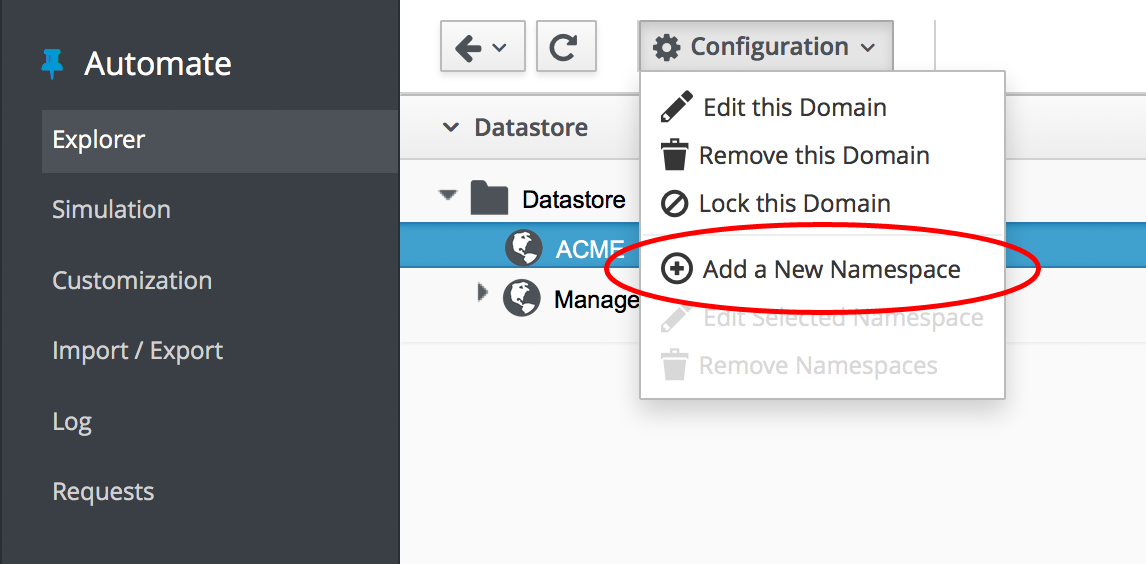
Figure 3. Adding a new namespace
Give the namespace the Name General and the Description General Content
Adding a Class
Now we’ll add a new class, called Methods.
|
Note
|
It may seem that naming a class "Methods" is somewhat confusing, however many of the generic classes in the ManageIQ domain in the Automate Datastore are called "Methods" to signify their general-purpose nature). |
Highlight the General domain icon in the sidebar, and click Configuration → Add a New Class (see Adding a new class).
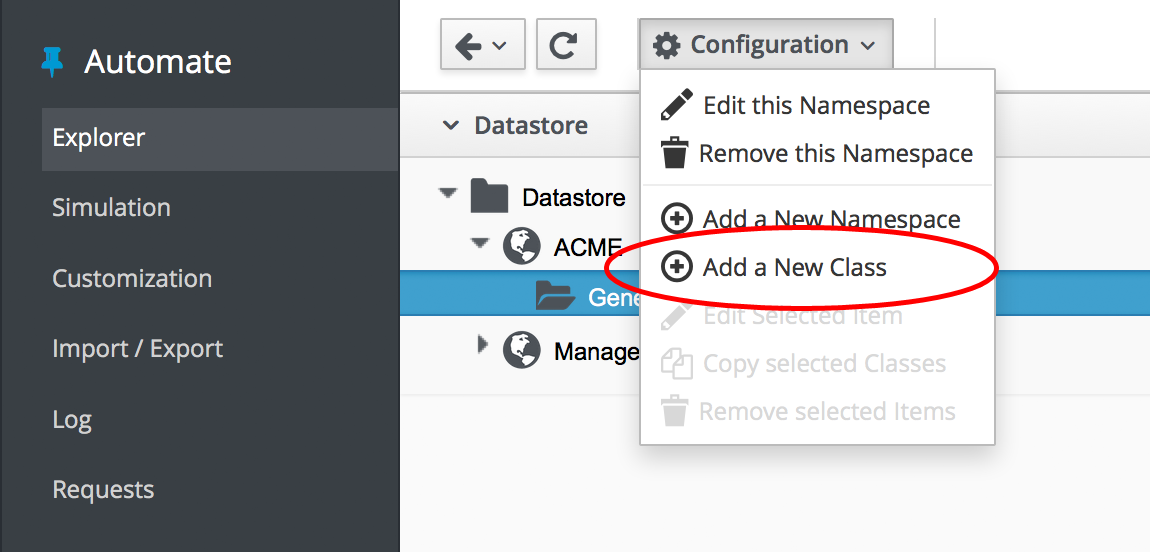
Figure 4. Adding a new class
Give the class the Name Methods and the Description General Instances and Methods. We’ll leave the Display Name empty for this example.
Editing the Schema
We’ll create a simple schema. Click the Schema tab for the Methods class, and click Configuration → Edit selected Schema (see Editing the schema).
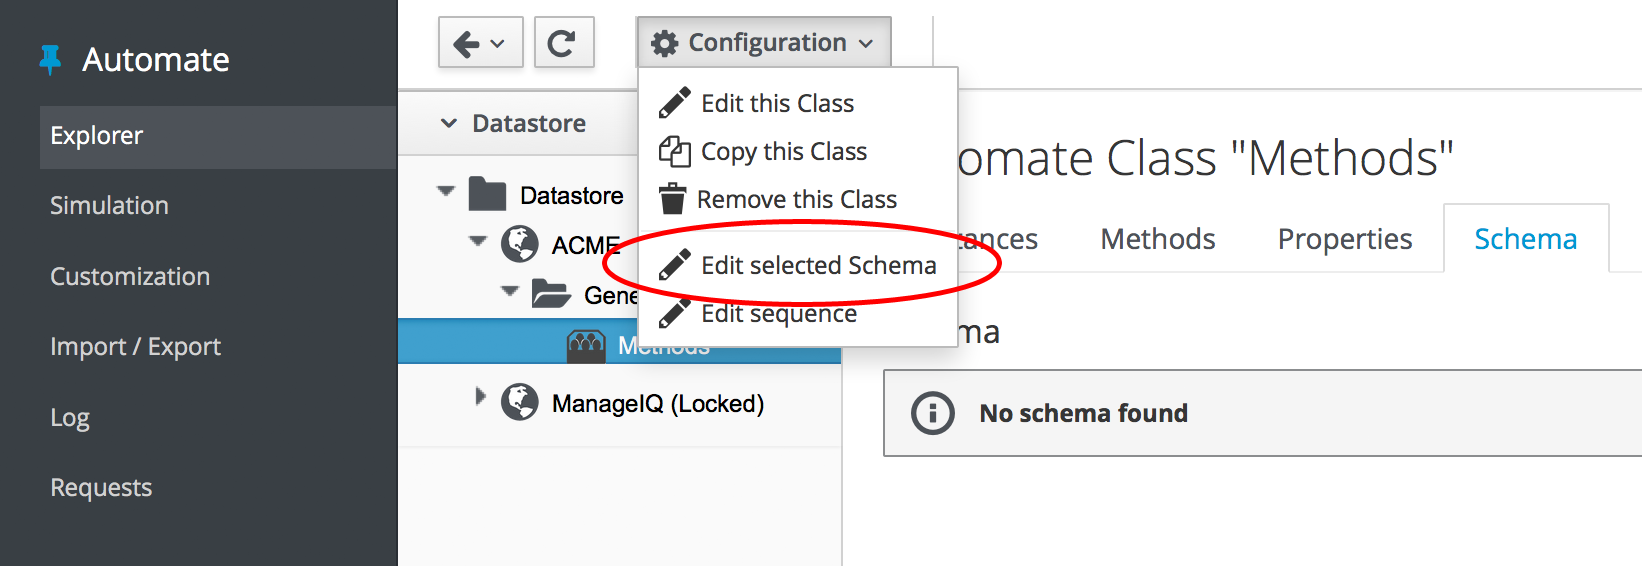
Figure 5. Editing the schema
Click New Field, and add a single field with name execute, Type Method and Data Type String (see Adding a new schema field).
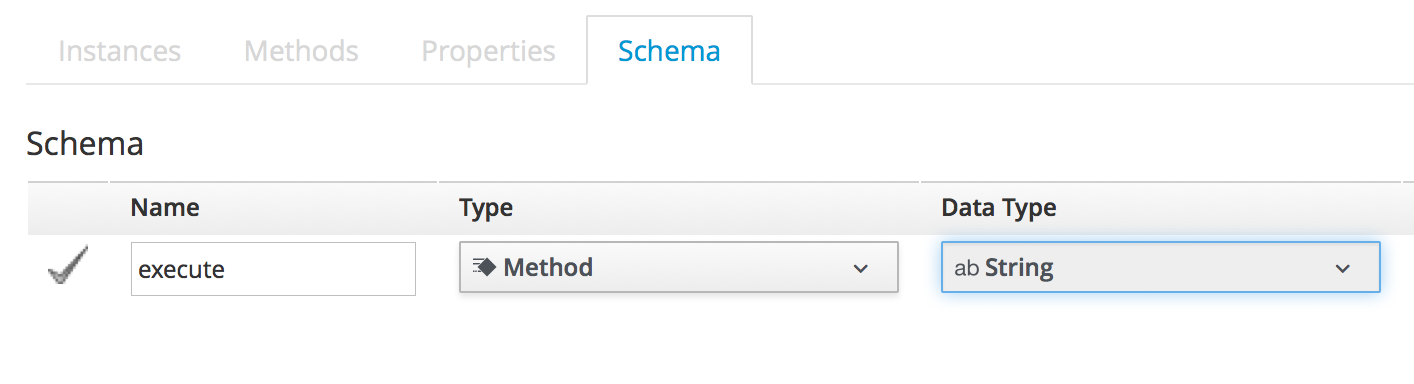
Figure 6. Adding a new schema field
Click the tick icon in the lefthand column to save the field entry, and click the Save button to save the schema. We now have our generic class definition called Methods setup, with a simple schema that executes a single method.
Hello, World!
Our first Automate method is very simple, we’ll write an entry to the automation.log file using a two-line script:
$evm.log(:info, "Hello, World!")
exit MIQ_OK
Adding a New Instance
As mentioned in Introduction to the Automate Datastore the Automation Engine runs scripts within the context of instances, so first we need to create an instance from our class. In the Instances tab of the new Methods class, select Configuration → Add a New Instance (see Adding a new instance to our class).
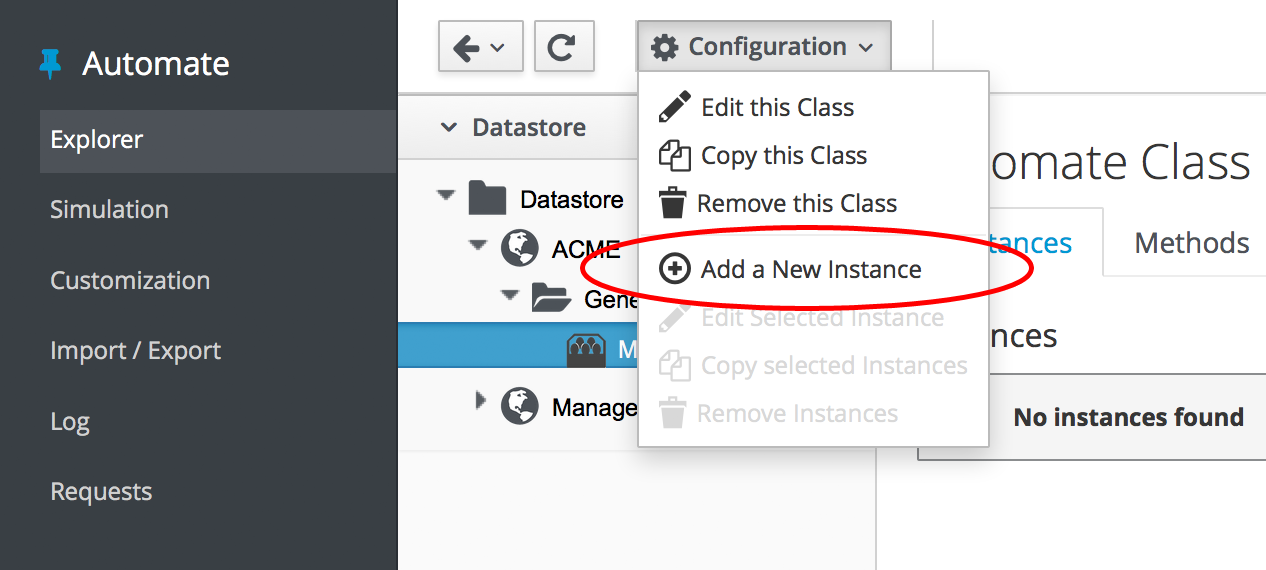
Figure 7. Adding a new instance to our class
We’ll call the instance hello_world, and it’ll run (execute) a method called hello_world (see Entering the instance details).
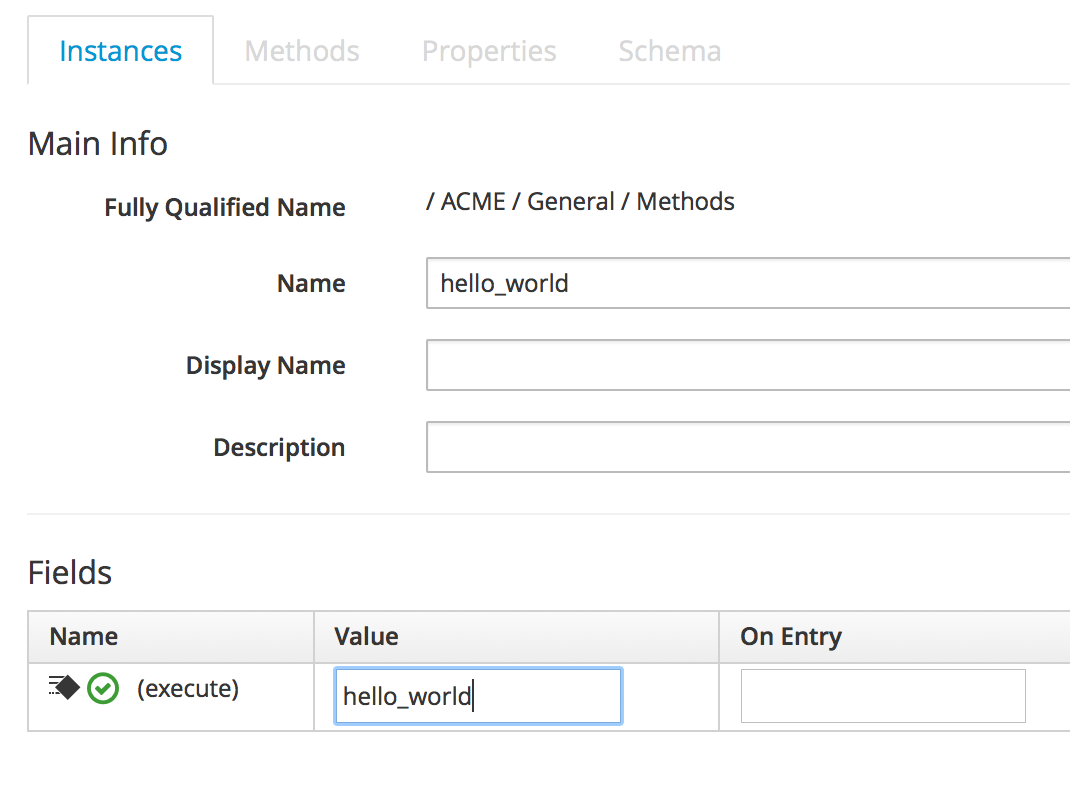
Figure 8. Entering the instance details
Click the Add button.
Adding a New Method
In the Methods tab of the new Methods class, select Configuration → Add a New Method (see Adding a new method to our class).
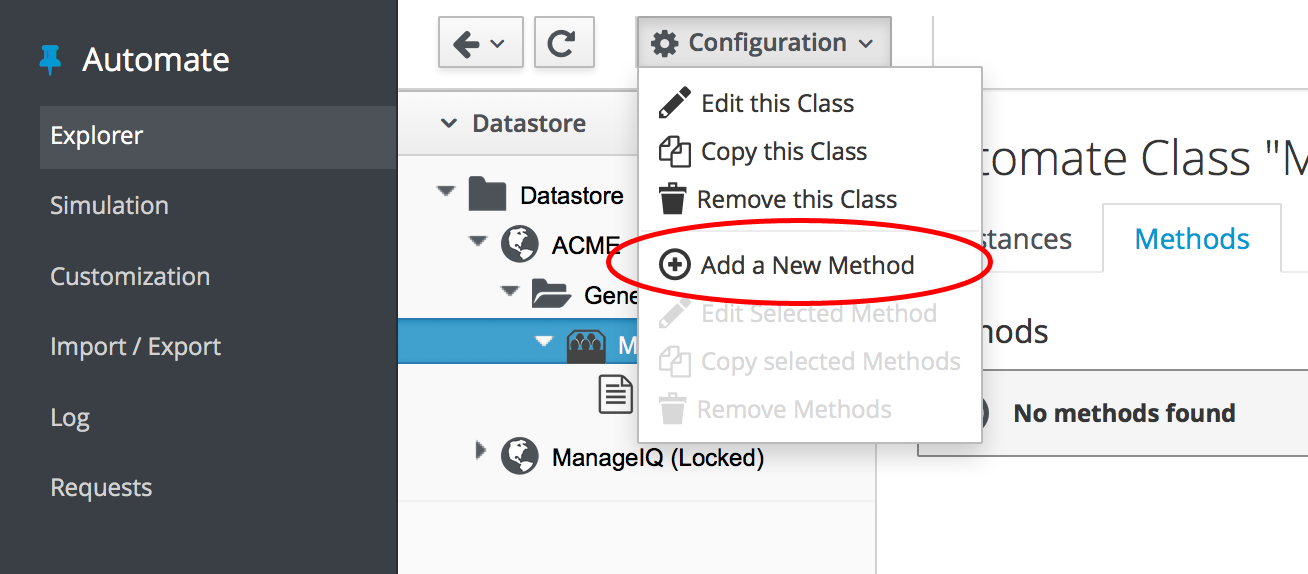
Figure 9. Adding a new method to our class
Name the method hello_world, and paste our two lines of code into the Data window (see Entering the method details).
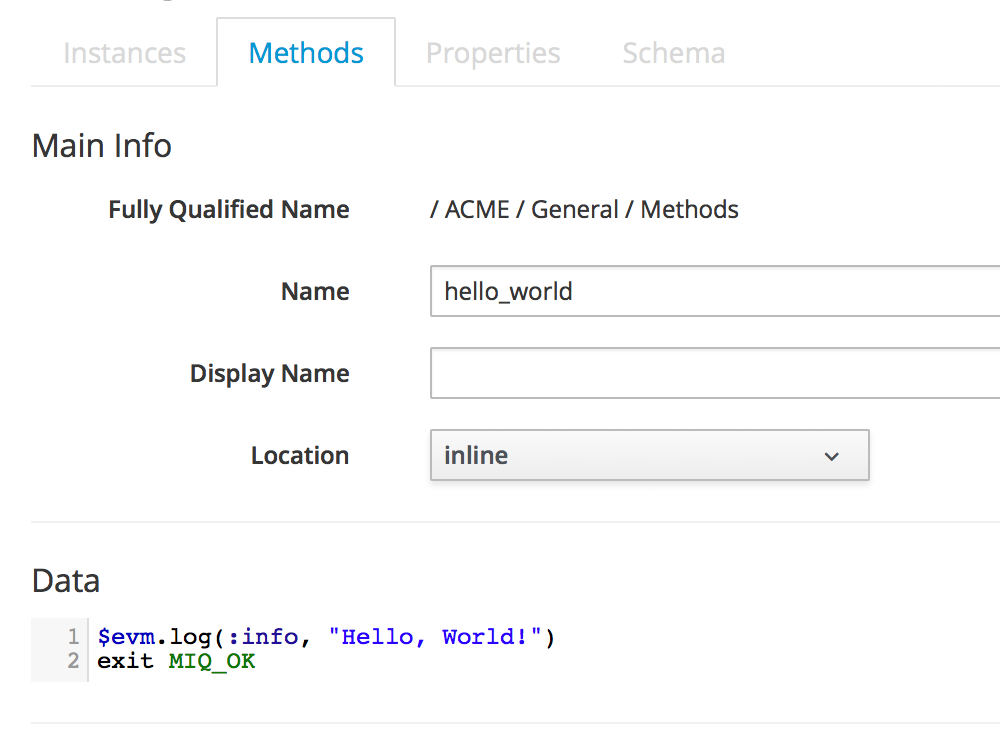
Figure 10. Entering the method details
Click Validate, and then the Add button.
|
Tip
|
Get into the habit of using the Validate button, it can save a lot of time catching Ruby syntactical typos when you develop more complex scripts |
Running the Instance
We’ll run our new instance using the Simulation functionality of Automate, but before we do that, login to CloudForms/ManageIQ again from another browser or a private browsing tab, and navigate to Automate → Log in the WebUI [1]
|
Note
|
The CloudForms/ManageIQ WebUI uses browser session cookies, so if we want two or more concurrent login sessions (particularly as different users), it helps to use different web browsers or private/incognito windows. |
In the simulation we actually run an instance called call_instance in the /System/Request/ namespace of the ManageIQ domain, and this in turn calls our hello_world instance using the namespace, class and instance attribute/value pairs that we pass to it (see Ways of Entering Automate).
From the Automate → Simulation menu, complete the details (see Completing the Simulation details).
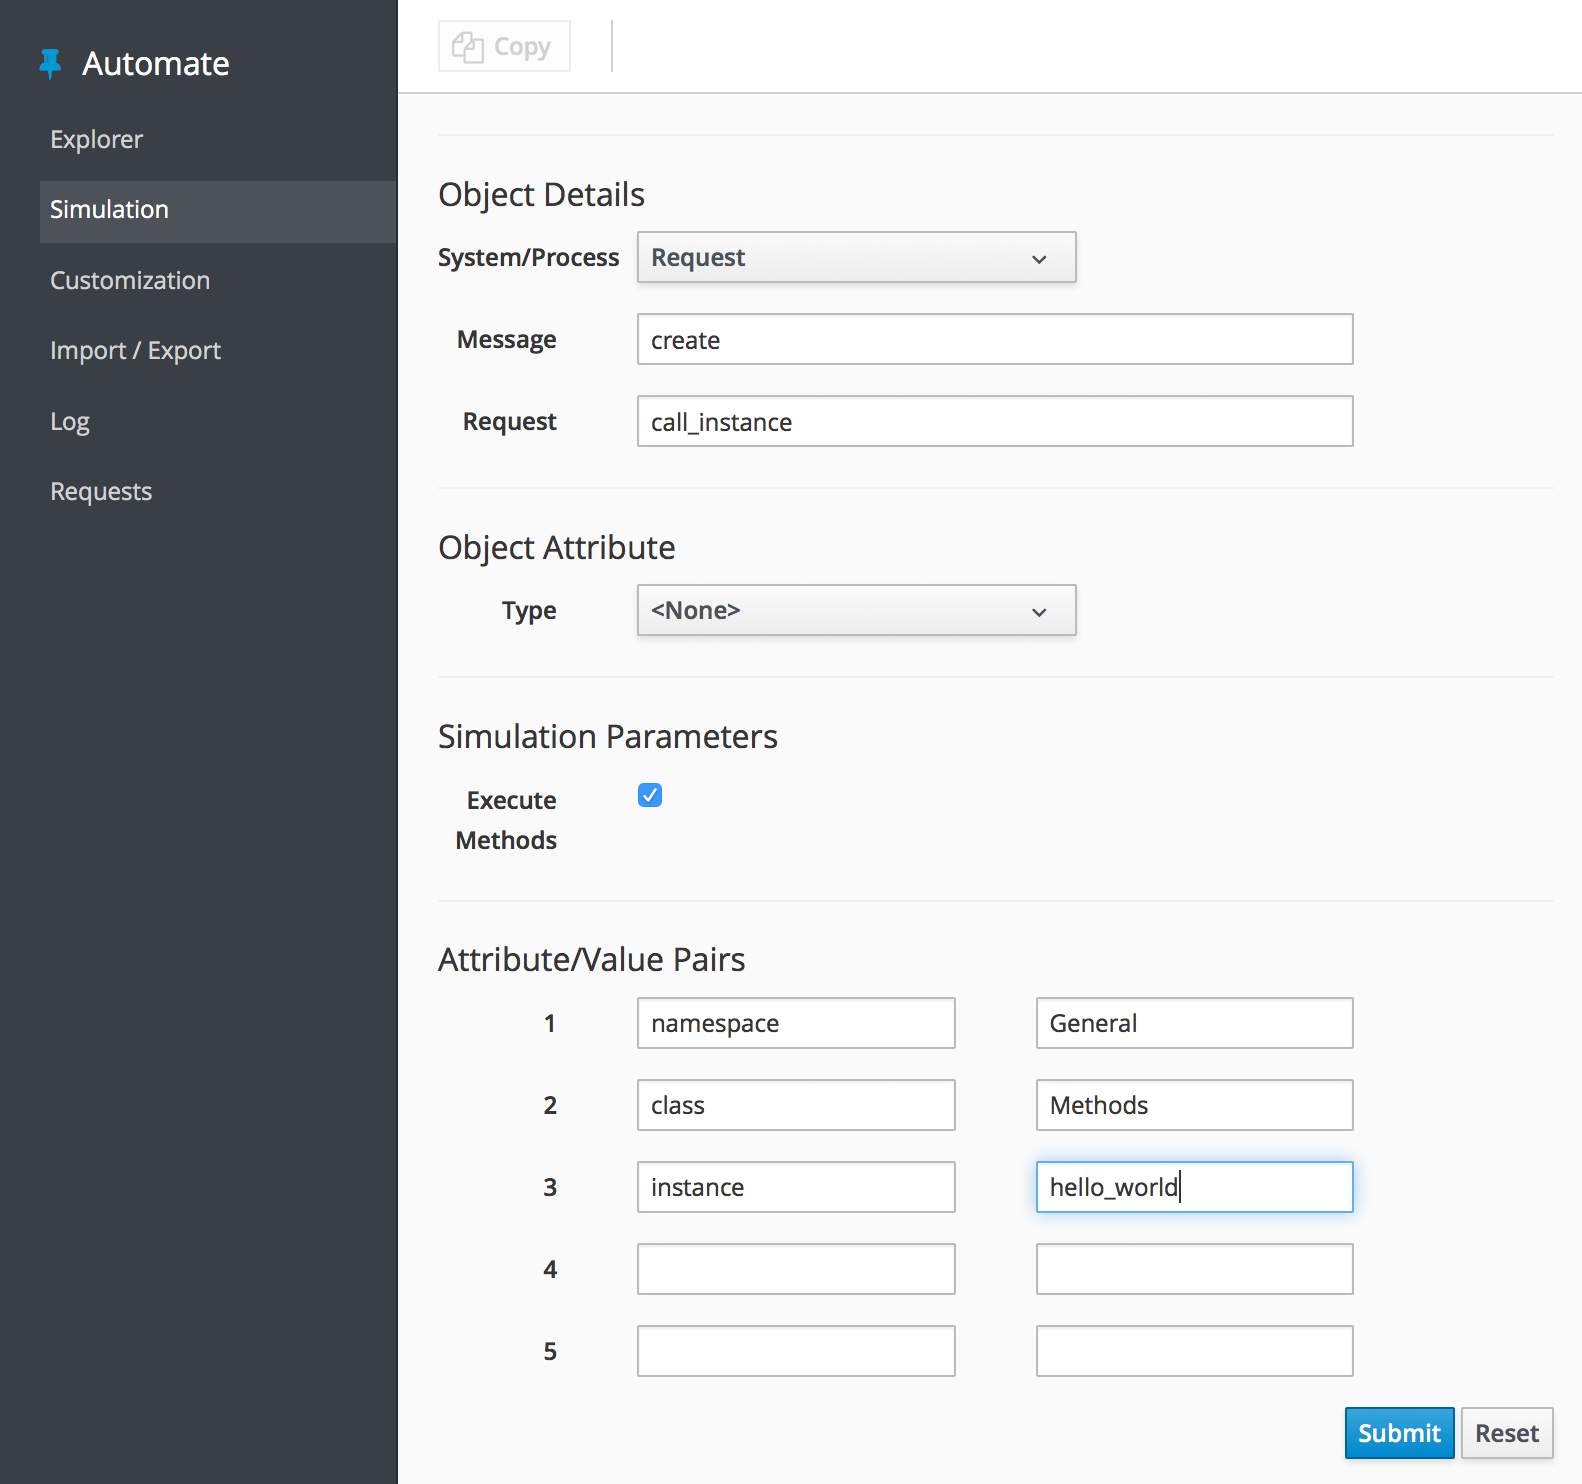
Figure 11. Completing the Simulation details
Click Submit
If all went well, we should see our "Hello, World!" message appear in the automation.log file.
Invoking [inline] method [/ACME/General/Methods/hello_world] with inputs [{}]
<AEMethod [/ACME/General/Methods/hello_world]> Starting
<AEMethod hello_world> Hello, World!
<AEMethod [/ACME/General/Methods/hello_world]> Ending
Method exited with rc=MIQ_OK
Success!
Exit Status Codes
In our example we used an exit status code of MIQ_OK. Although with simple methods such as this we don’t strictly need to specify an exit code, it’s good practice to do so. When we build more advanced multimethod classes and state machines, an exit code can signal an error condition to the Automation Engine so that action can be taken.
There are four exit codes that we can use:
MIQ_OK (0) - Continues normal processing. This is logged to automation.log as:
Method exited with rc=MIQ_OK
MIQ_WARN (4) - Warning message, continues processing. This is logged to automation.log as:
Method exited with rc=MIQ_WARN
MIQ_ERROR / MIQ_STOP (8) - Stops processing current object. This is logged to automation.log as:
Stopping instantiation because [Method exited with rc=MIQ_STOP]
MIQ_ABORT (16) - Aborts entire automation instantiation. This is logged to automation.log as:
Aborting instantiation because [Method exited with rc=MIQ_ABORT]
|
Note
|
The difference between MIQ_STOP and MIQ_ABORT is subtle, but comes into play as we develop more advanced Automate workflows. MIQ_STOP stops the currently running instance, but if this instance was called via a reference from another ‘parent’ instance, the subsequent steps in the parent instance would still complete. MIQ_ABORT stops the currently running instance and any parent instance that called it, terminating the Automate task altogether. |
Summary
In this chapter we’ve seen how simple it is to create our own domain, namespace, class, instance and method, and run our script from simulation. These are the fundamental techniques that we use for all of our automation scripts, and we’ll use this knowledge extensively as we progress through the book.
We’ve also discovered the status codes that we should use to pass our exit status back to the Automation Engine.
1. Alternatively ssh into the appliance as root, and
tail -f /var/www/miq/vmdb/log/automation.log