Creating an Ansible Tower Service Catalog Item and Bundle
In this chapter we’ll run through practical examples of creating an individual Ansible Tower catalog item, and a catalog bundle to include an Ansible Tower service.
Service Catalog Item
First we’ll create a service catalog item to run the "Simple LAMP Stack" job template that we developed in Running an Ansible Tower Job From a Button.
Service Dialog
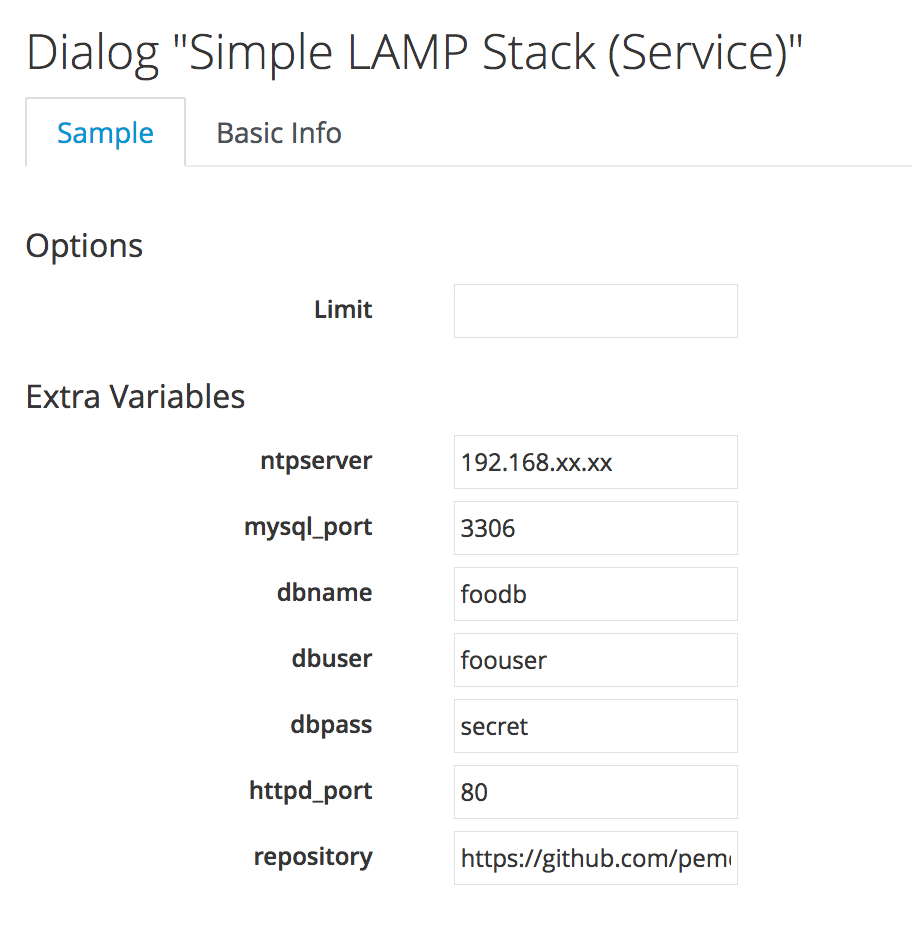
We need to re-import the "Simple LAMP Stack" Ansible Tower job template as a service dialog as we did previously, but this time we’ll leave the "Options" box and "Limit" element in place. We use the limit element to name the VM on which we want to run the service. Once again we’ll edit each element in the dialog to deselect the 'Read only" checkbox, and then finally save the new service dialog as "Simple LAMP Stack (Service)" (see New service dialog).
Figure 1. New service dialog
Catalog Item
We’ll create a new service catalog item as we have before, but this time the catalog item type will be "AnsibleTower". We complete the catalog item definition as shown in Ansible Tower catalog item.
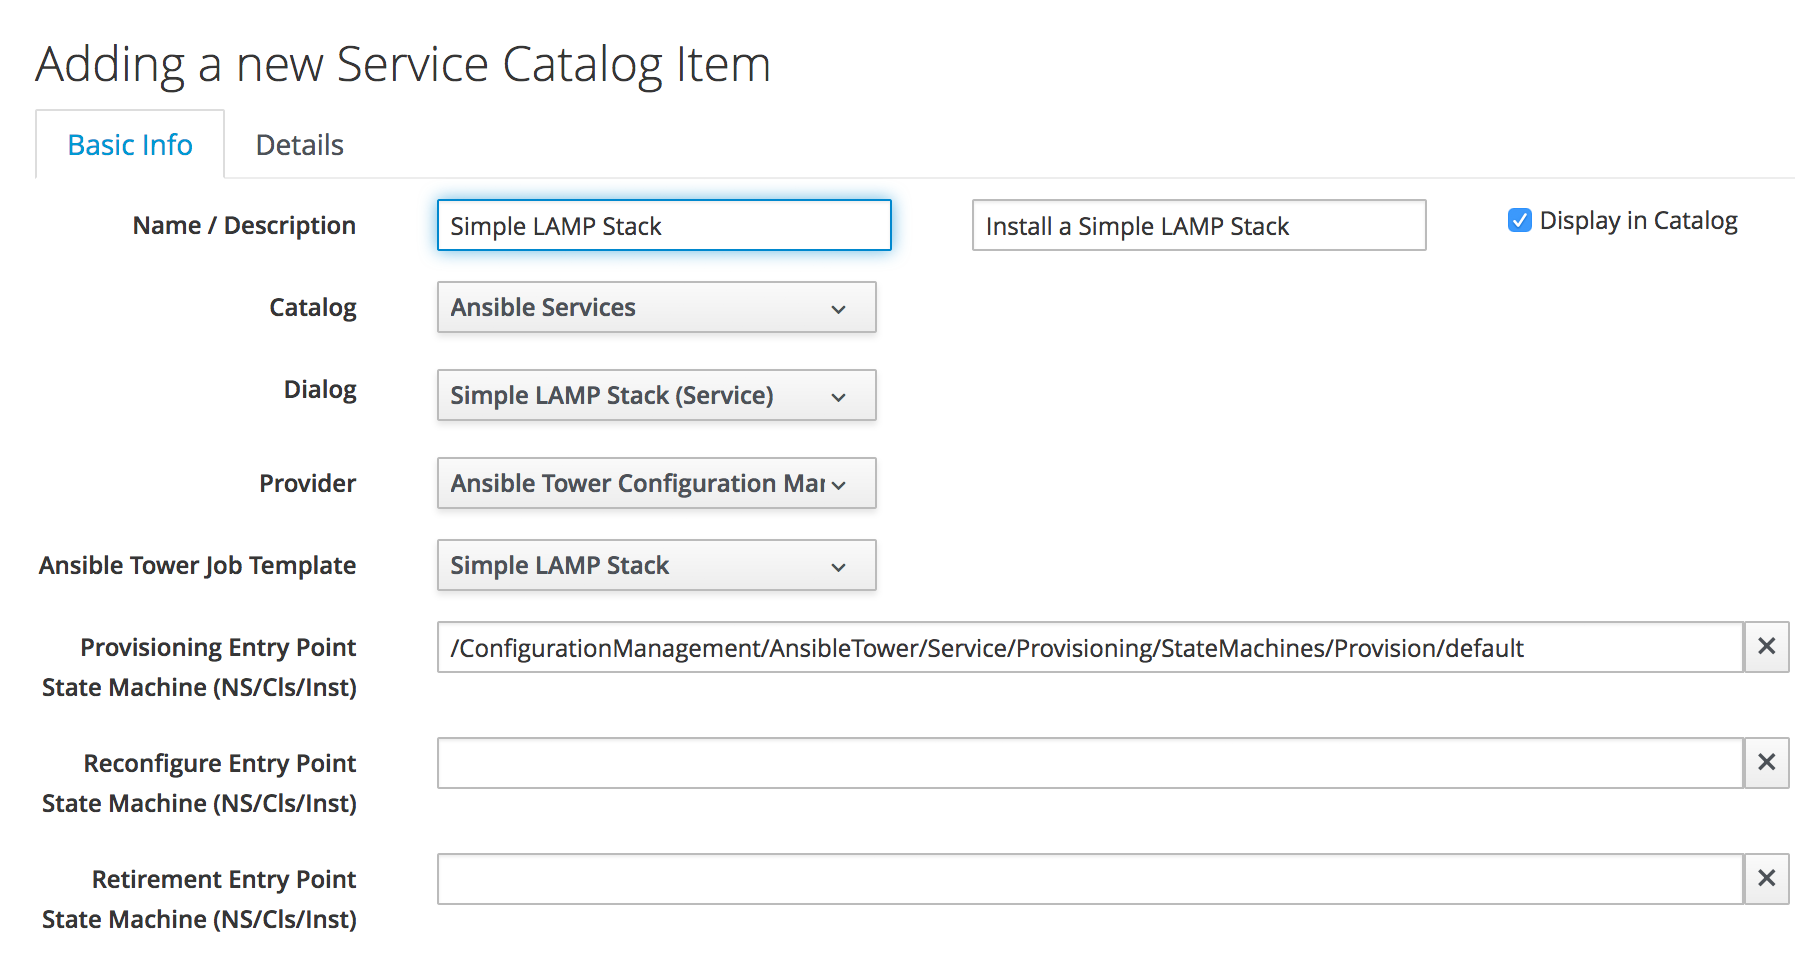
Figure 2. Ansible Tower catalog item
We’ll select the StateMachines/Provision/default state machine as our provisioning entry point.
Ordering the Catalog Item
Once created, we can order our new item from the service catalog. We’ll see the new service dialog, which we complete with suitable values (see Ordering the catalog item).
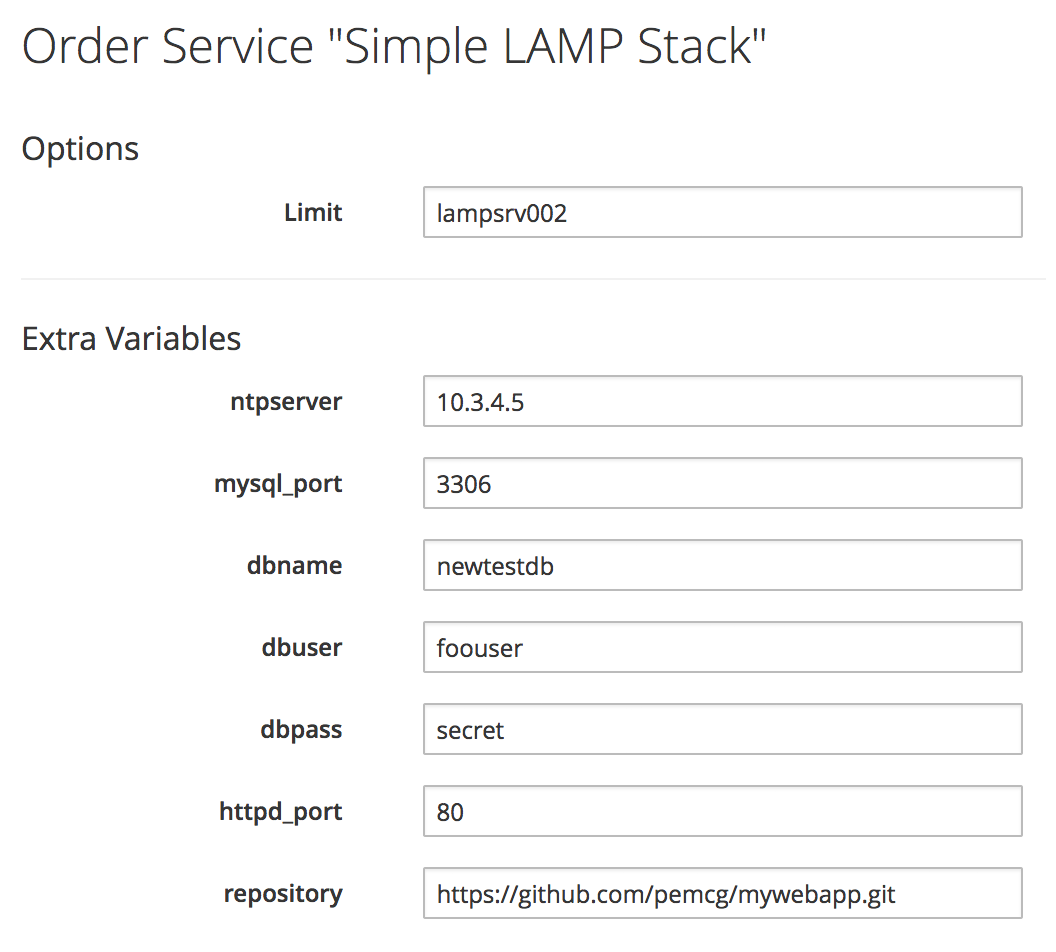
Figure 3. Ordering the catalog item
When we click on Submit the job request is passed to Tower, and we can follow the progress of our job in the Tower WebUI.
Service Catalog Bundle
We’ll now create a service bundle comprising a VM provisioning catalog item, followed by an Ansible configuration catalog item. We’ll adapt the Ansible catalog item that we have just created to make it suitable for use as part of a bundle.
Service Dialog
We’ll edit the "Simple LAMP Stack" service dialog to remove the "Options" box and "Limit" element. We’ll add a new box called "Service & VM Details", containing two text box elements named "Service Name" and VM Name (as we did in Creating a Service Catalog Item). The element with the label "Service Name" should have the name "service_name". The element with the label "VM Name" should have the name "option_1_vm_name". We’ll save the new service dialog as "CentOS 7 LAMP Server Bundle" (see Modified service dialog).
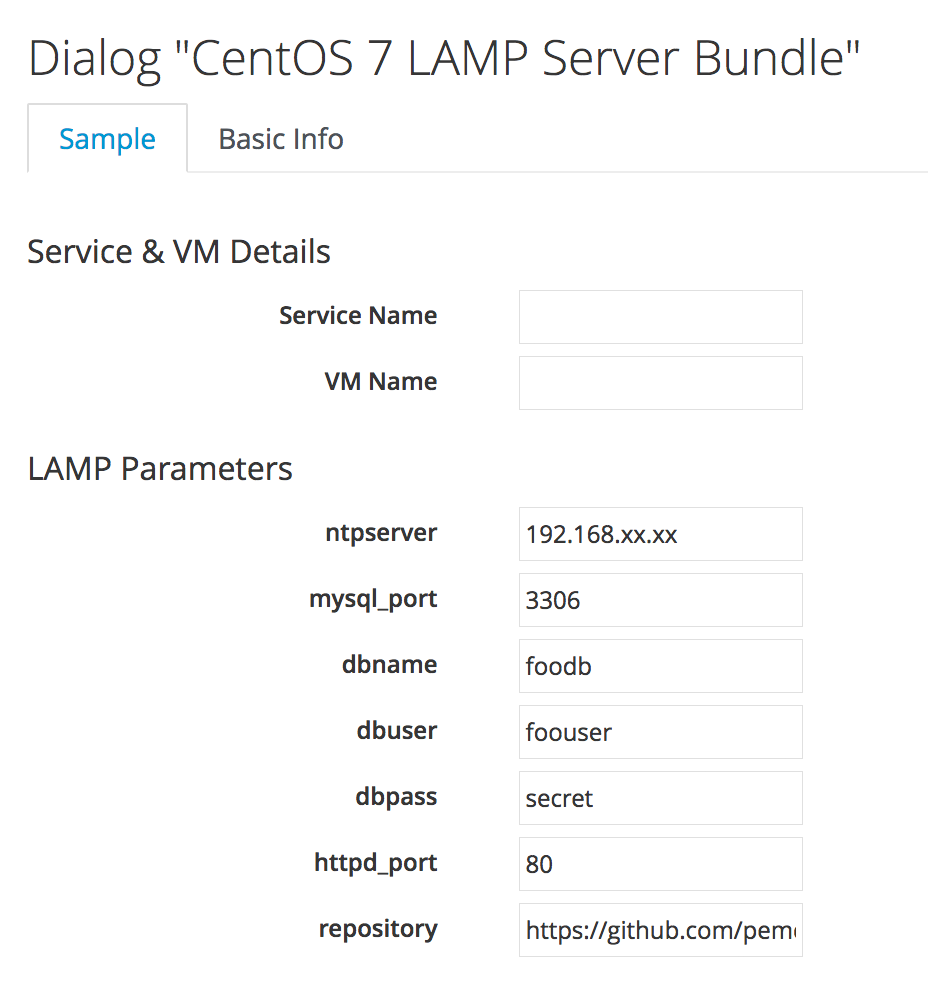
Figure 4. Modified service dialog
Limit Switch
We still need a way of passing the correct limit switch to Ansible Tower when the job is run. For a simple dialog we could have left the "Limit" element as either a static text box, or a dynamically populated text box, with the default value taken from the input to the "VM Name" element. For this example however we’re going to be use our knowledge of the Ansible-related automate methods and objects to dynamically set the limit variable (see Automatically Setting the Ansible 'limit' variable in a Service Bundle below).
Ansible Tower Catalog Item
We’ll make two small changes to the Ansible Tower catalog item. We’ll unset the dialog, and change the Provisioning Entry Point to the StateMachines/Provision/provision_from_bundle state machine. The modified catalog item definition is shown in Modified Ansible Tower catalog item.
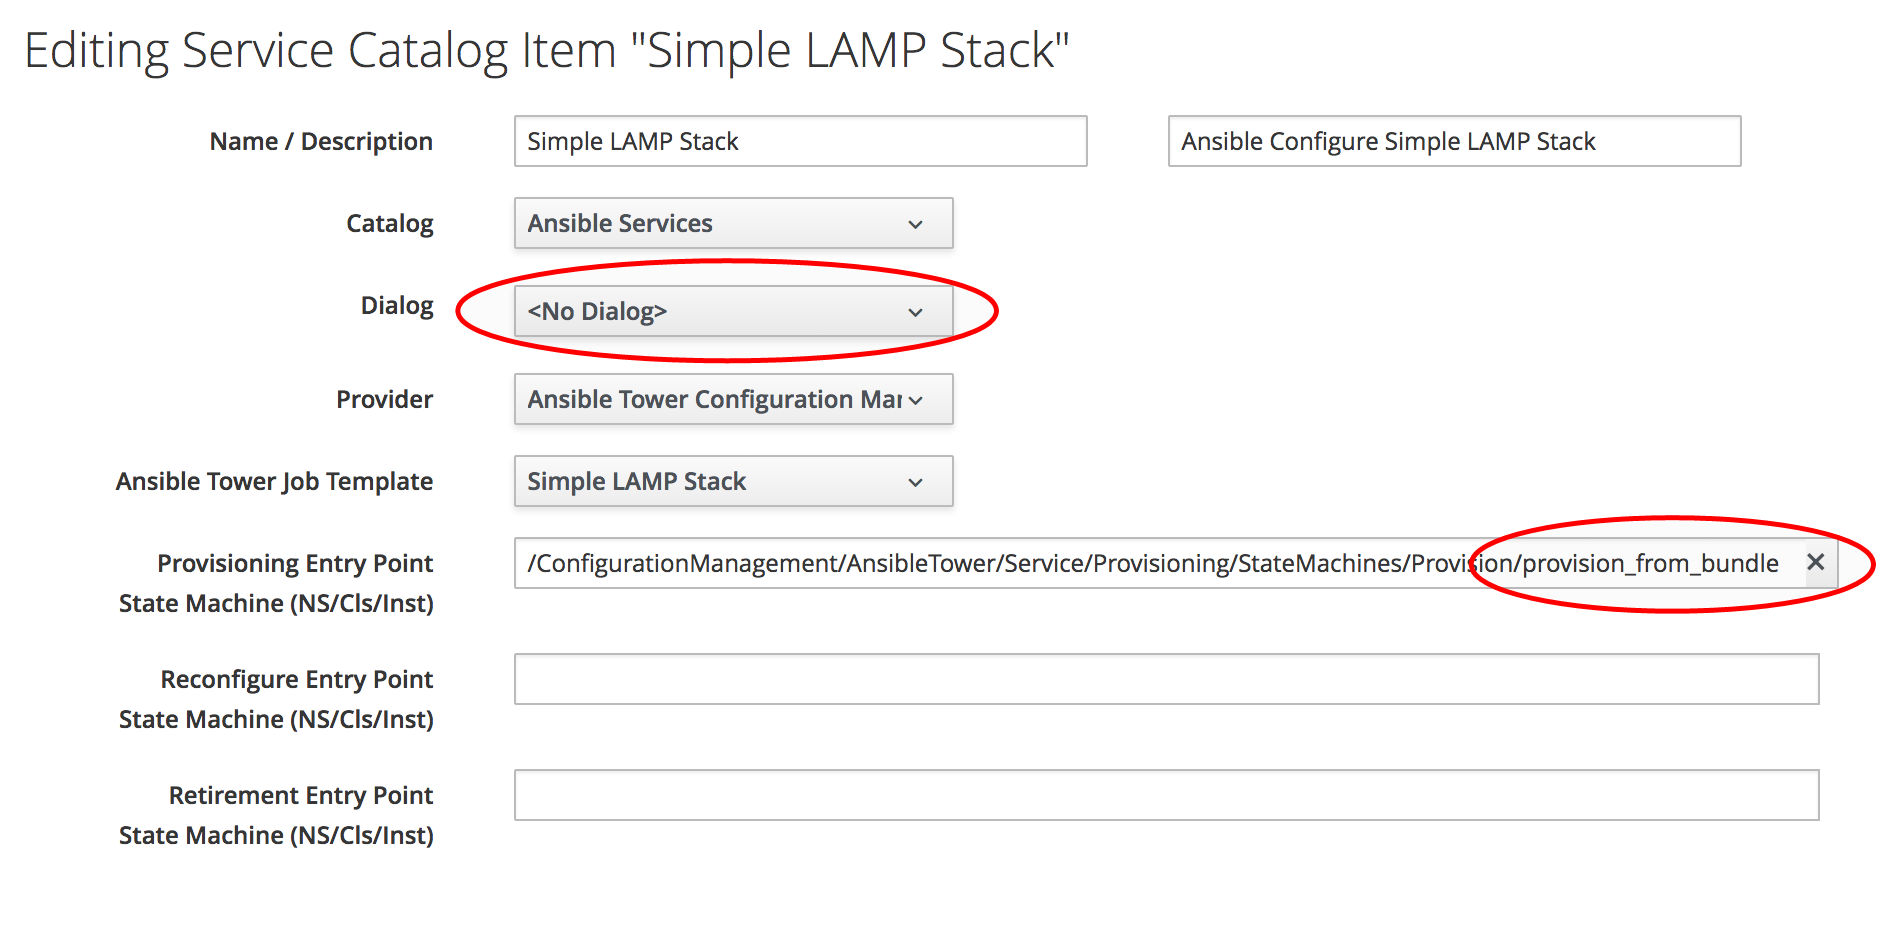
Figure 5. Modified Ansible Tower catalog item
Creating the Service Catalog Bundle
Now we can go ahead and create our catalog bundle as we did in Creating a Service Catalog Bundle. We’ll use the same Provisioning Entry Point of ManageIQ/Service/Provisioning/StateMachines/ServiceProvision_Template/CatalogBundleInitialization. When we select the resources for the bundle, we’ll pick a generic "CentOS 7.2 Server" catalog item as the VM to be provisioned, and our newly modified "Simple LAMP Stack" Ansible configuration catalog item. We must ensure that the Action Order and Provision Order are set correctly so that the Ansible job template runs after the VM has been provisioned successfully. (see Bundle resources).
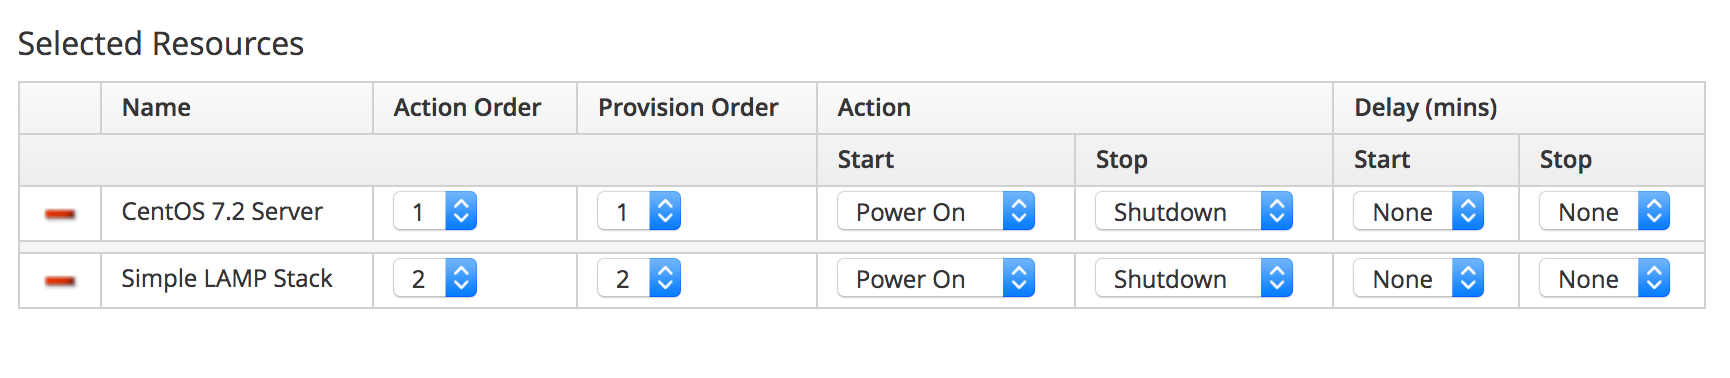
Figure 6. Bundle resources
Automatically Setting the Ansible 'limit' variable in a Service Bundle
We need a way of passing the name of the newly provisioned virtual machine to the Ansible Tower job template as the "limit" variable, so that the configuration is applied solely to the new VM. In our example we’re prompting the user for the VM name from the service dialog when the service is ordered, and so the VM name will be known in advance. This may not always be the case though; we may be auto-generating our own VM names, for example.
As we discovered in Ansible Tower Services, both the default and provision_from_bundle state machine instances call a preprovision method that allows us to optionally modify the job options sent to Tower. We’ll use this facility to add our own code that navigates though the object structure to extract the :vm_target_name value from the options hash in the previous VM provisioning operation. By using this value for our "limit" variable, we ensure that the job template limit switch is set correctly (and automatically), regardless of the way that the VM name was created.
Our code will search for a ServiceTemplateProvisionTask with a provision_priority attribute one less than our own. Having found this 'prior' ServiceTemplateProvisionTask, it will then follow the associations through its child and grandchild task(s) to find the options hash. (see also The Service Provisioning State Machine and Service Objects for descriptions of these objects). The navigation path is shown in Navigating through the service model objects.
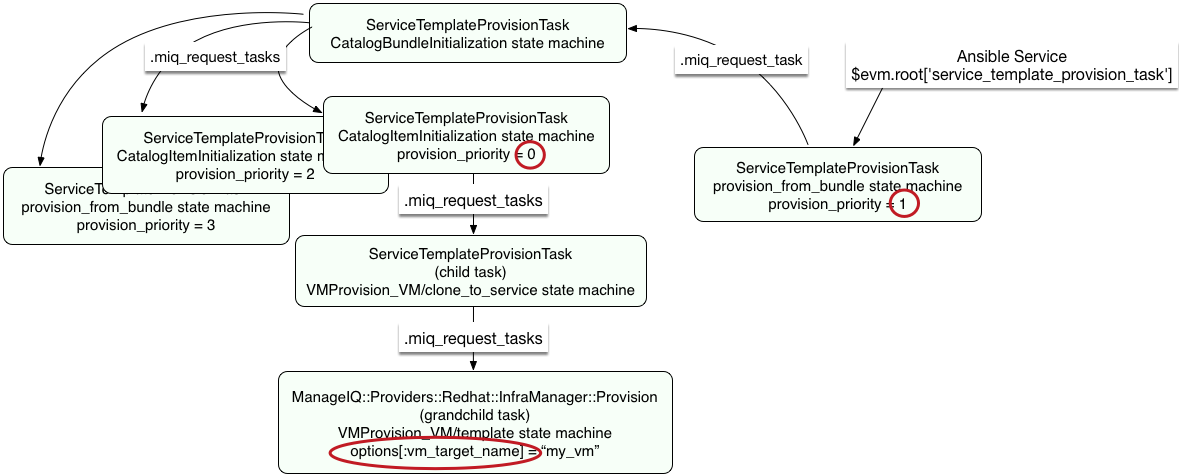
Figure 7. Navigating through the service model objects
Preparation
We’ll clone the /ConfigurationManagement/AnsibleTower/Service/Provisioning/StateMachines/Provision/provision_from_bundle state machine to our own domain, and replace the Method::preprovision line by Method::preprovision_from_bundle, as follows:
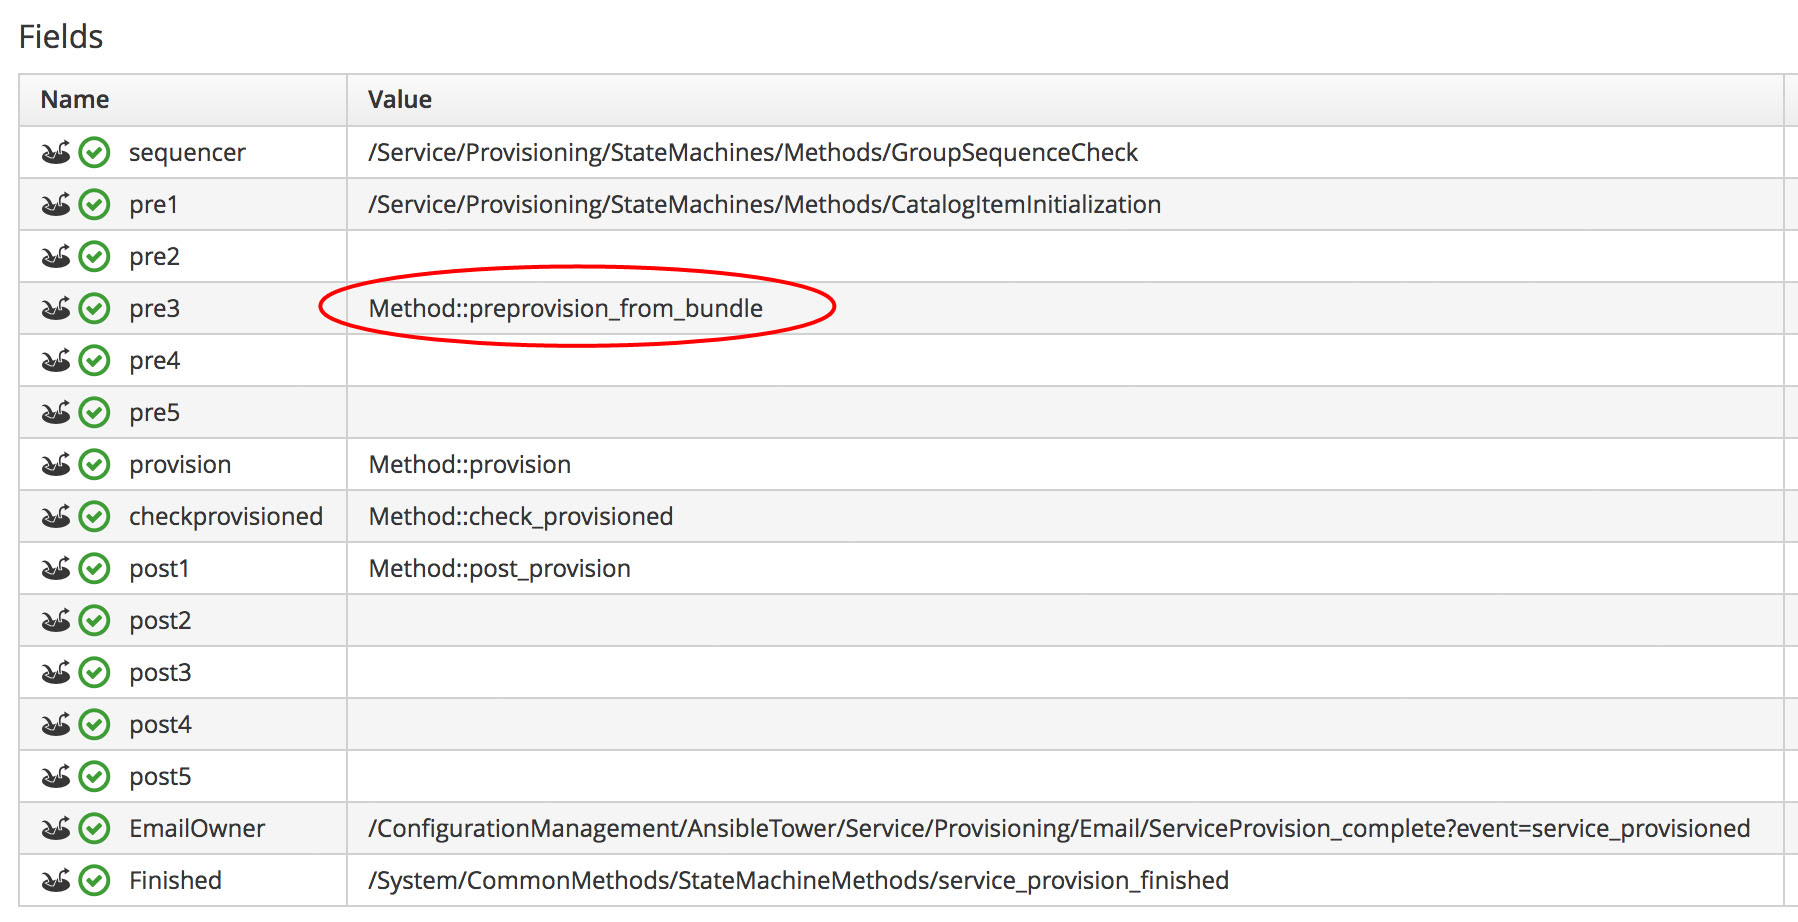
Figure 8. Modified provision_from_bundle state machine
Now we’ll copy the /ConfigurationManagement/AnsibleTower/Service/Provisioning/StateMachines/Provision/preprovision method into our domain, rename it as preprovision_from_bundle, and edit it as follows.
We’ll add a new method prior_service_vm_names, which performs the navigation around the service model objects. The code is as follows:
def prior_service_vm_names
  vm_names = []
  unless task.provision_priority.zero?
    prior_task = task.miq_request_task.miq_request_tasks.find do |miq_request_task|
      miq_request_task.provision_priority == task.provision_priority - 1
    end
    unless prior_task.nil?
      prior_task.miq_request_tasks.each do |child_task|
        child_task.miq_request_tasks.each do |grandchild_task|
          vm_names << grandchild_task.get_option(:vm_target_name)
        end
      end
    end
  end
  vm_names
end
We’ll edit the modify_job_options method to call prior_service_vm_names, as follows:
def modify_job_options(service)
  job_options         = service.job_options
  limit_names         = prior_service_vm_names
  job_options[:limit] = limit_names.join(",") unless limit_names.empty?
  service.job_options = job_options
end
Finally we uncomment the call to modify_job_options in the main method, as follows:
def main
  @handle.log("info", "Starting Ansible Tower Pre-Provisioning")
  examine_request(service)
  modify_job_options(service)
end
Ordering the Catalog Bundle
We can order our new bundle from the self-service WebUI catalog (see Self-service WebUI service catalog).
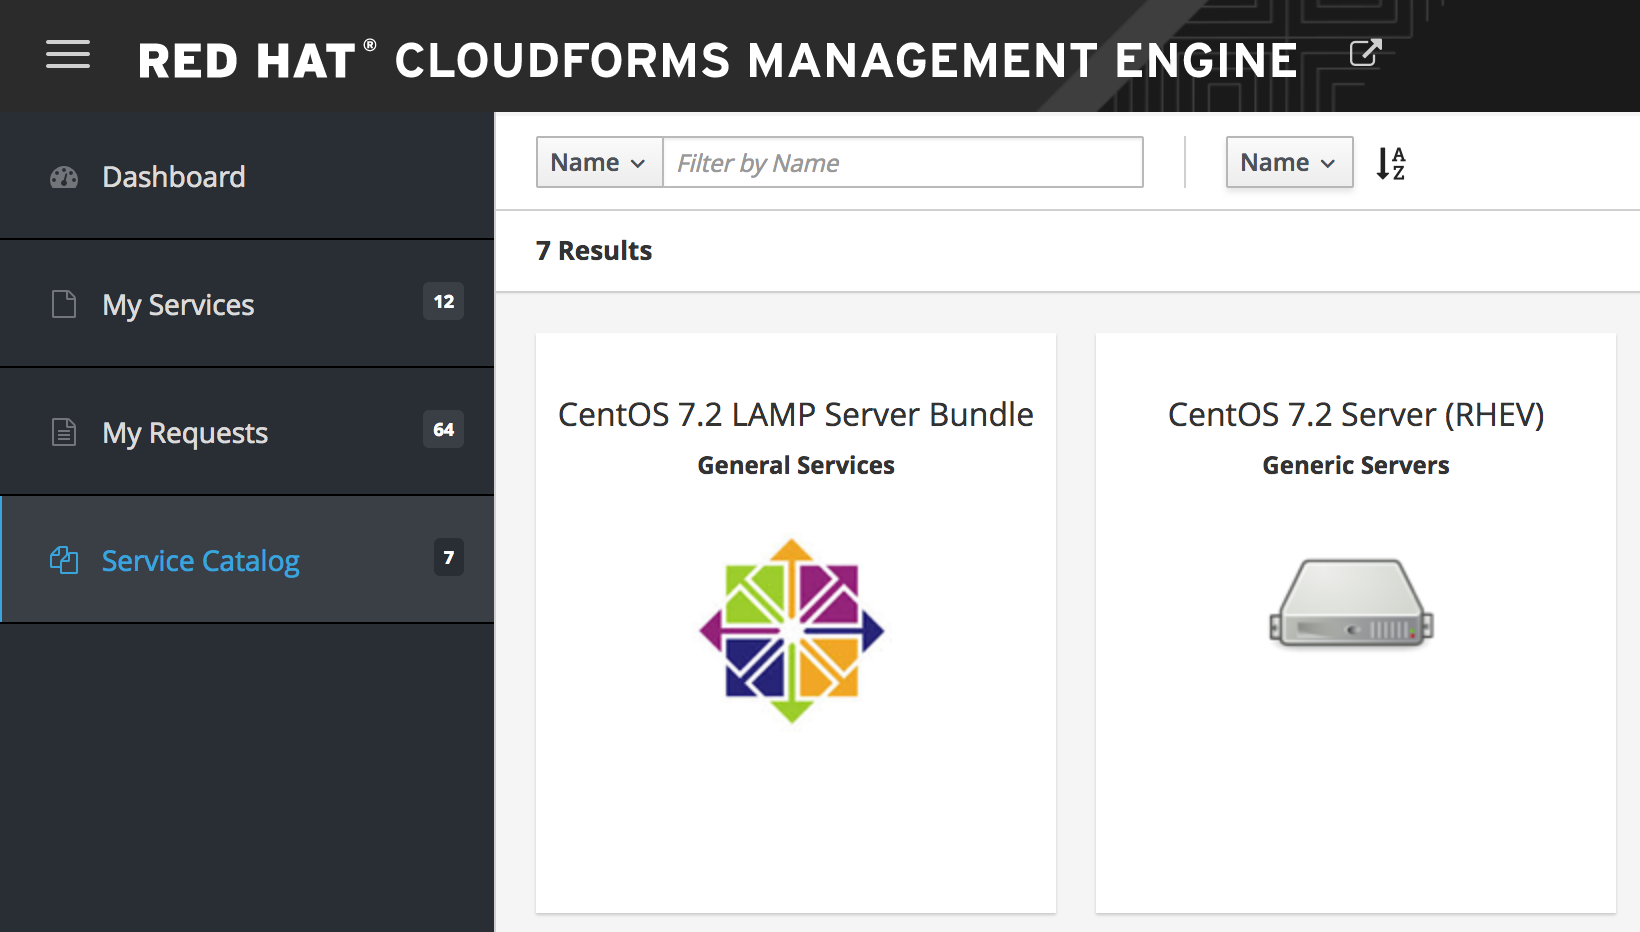
Figure 9. Self-service WebUI service catalog
We’ll see the new service dialog, which we complete with suitable values, and add to the shopping cart (see Ordering the catalog bundle).
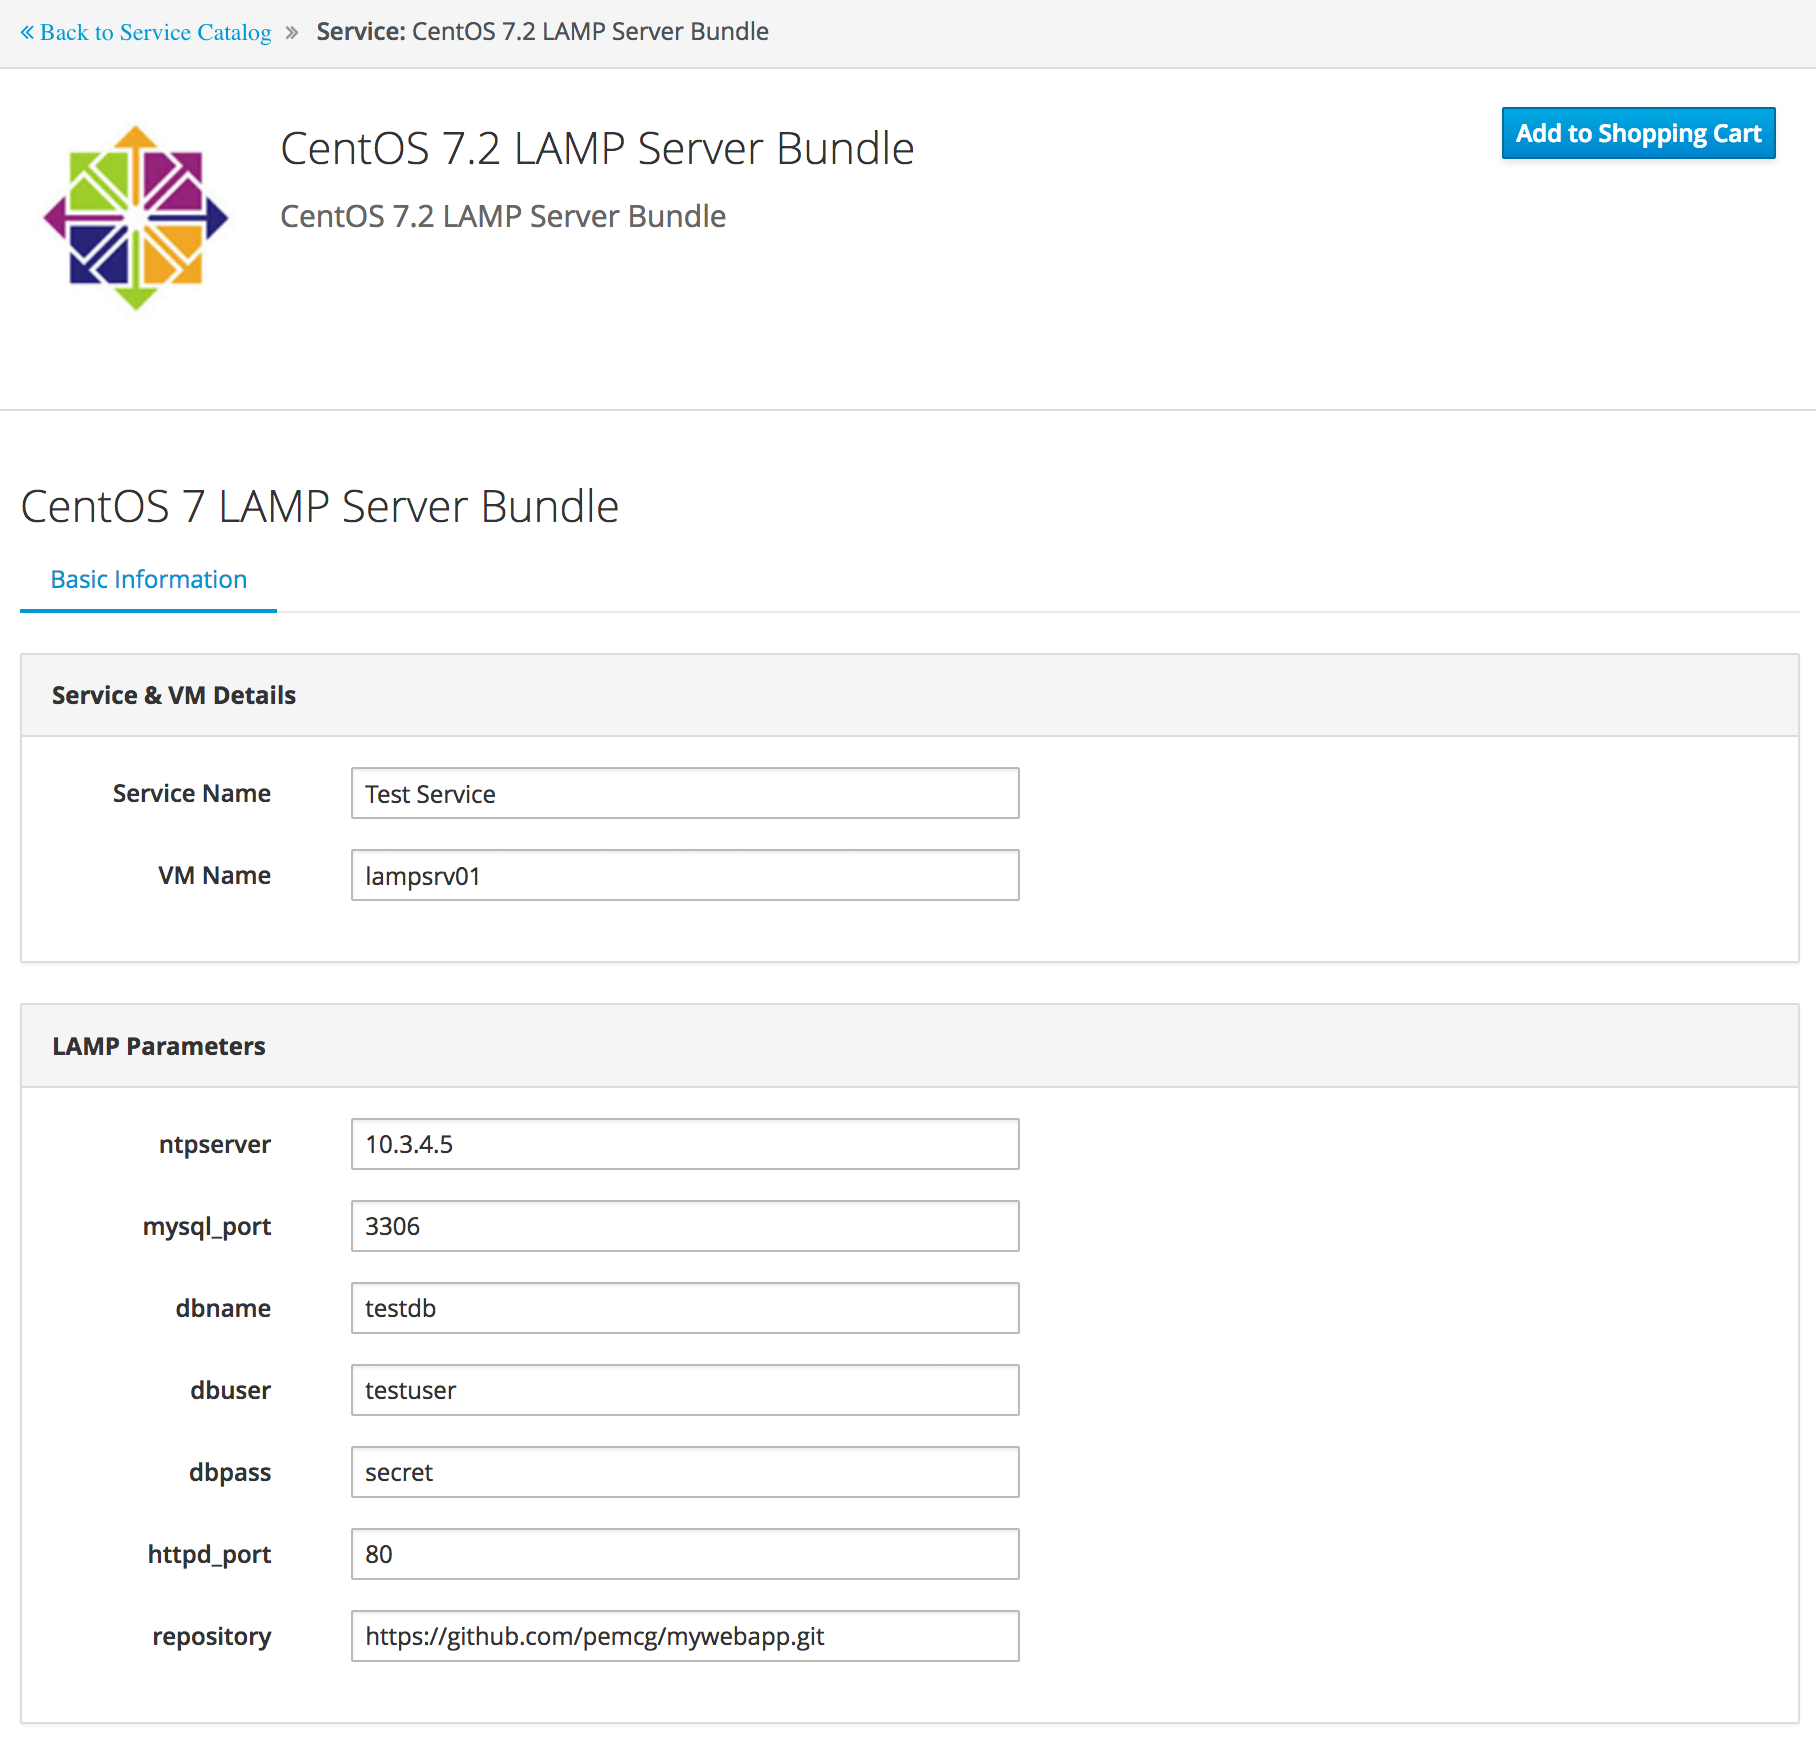
Figure 10. Ordering the catalog bundle
When we Order the contents of the shopping cart, the VM provisioning request begins. Once this has completed the Ansible job request is passed to Tower, and we can follow the progress of our job in the Tower WebUI. We see that the limit switch has been set correctly according to the VM name discovered by our preprovision_from_bundle method (see Ansible job results).
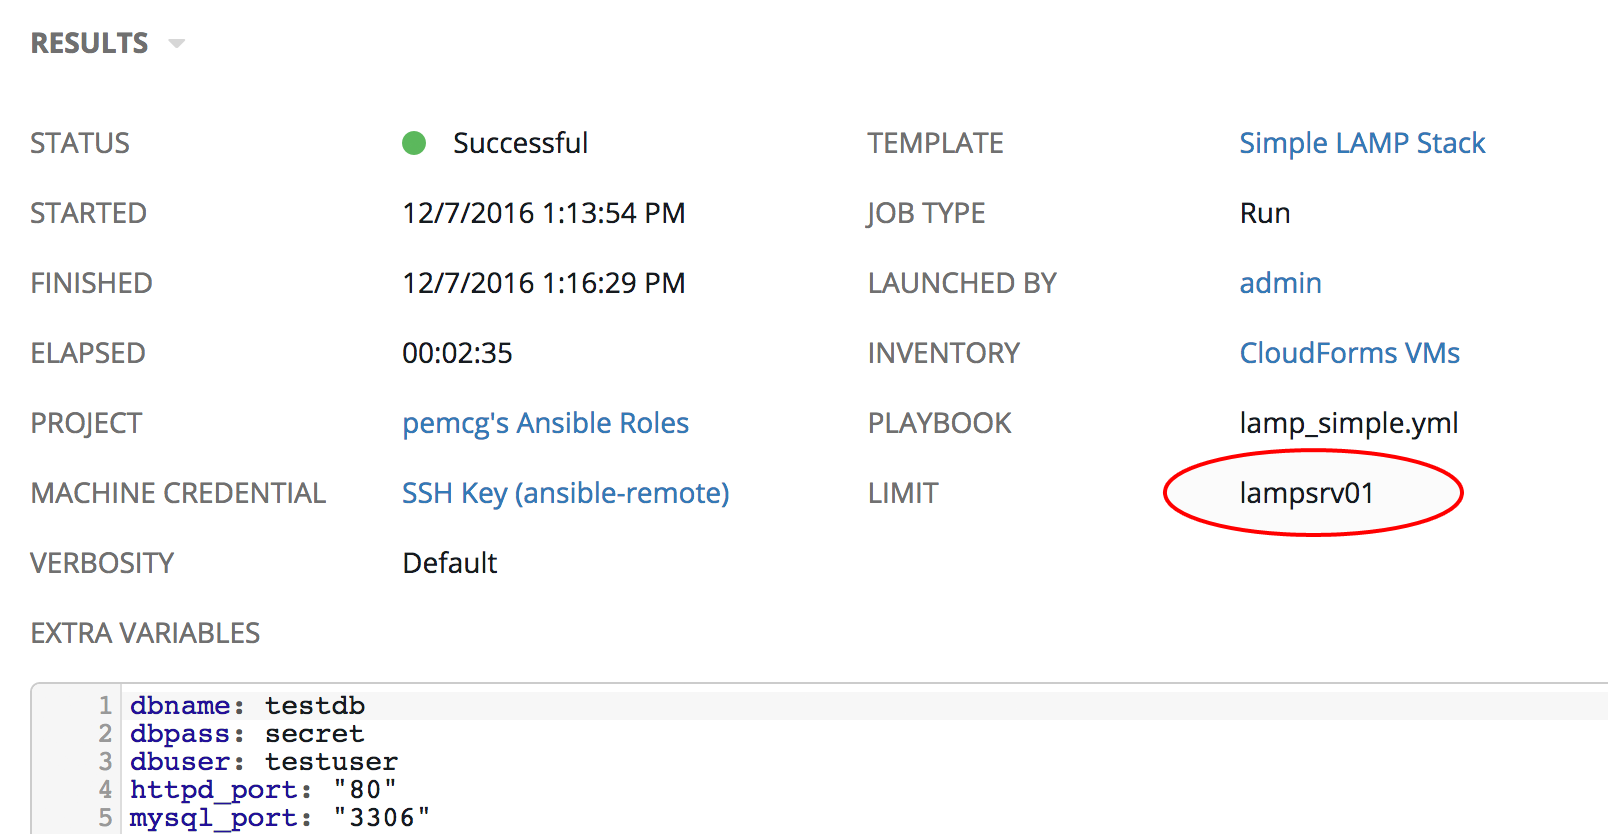
Figure 11. Ansible job results
Summary
These practical examples have shown the relative simplicity with which we can create CloudForms or ManageIQ services that launch Ansible Tower configuration jobs. We have seen how we can combine a provisioning service for a generic VM, with a configuration service that turns the VM into a specific server role.
When creating service bundles in this way we frequently pair together VM provision with Ansible configuration catalog items, and even form bundles out of several of these pairings. The modified preprovision_from_bundle method that we created will always forward the virtual machine name from the immediately prior VM provision to Tower. As long as we configure the provision order correctly when adding resources to the bundle, we can be sure that the limit variable will be set as required, and that the configuration will be applied to the most recently provisioned virtual machine.