The Provisioning Profile
As we have seen, some of the selections or choices involved in automating the provisioning process for virtual machines should be made within the context of the requesting user’s access control group. This allows our automation workflow to include group-specific processing logic. For example we may wish to direct development and test virtual machines to a specific cluster, or automatically name some virtual machines according to our own group-specific naming convention.
The attributes, relationships and method names that are used to determine these operations and decisions are stored in group-specific provisioning profiles. These include the selection of the appropriate provisioning dialog, checking the provisioning request against quota, an optional approval workflow for large VM requests, and the option to use group-specific VM naming and network allocation methods.
Location
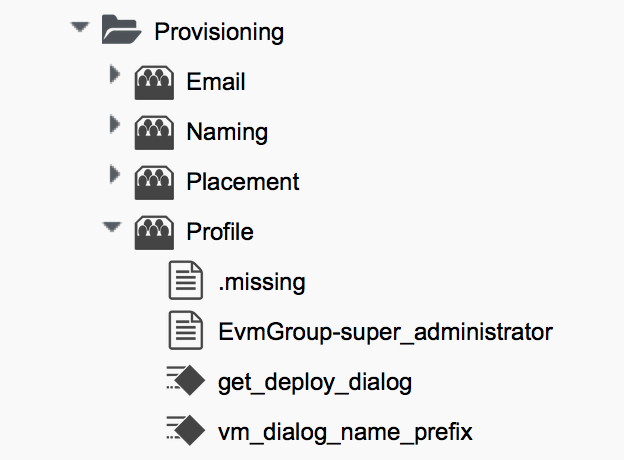
The provisioning profiles are stored under /{Cloud,Infrastructure}/VM/Provisioning/Profile. There is one out-of-the-box group-specific profile for the EvmGroup-super_administrator group, but we can create new profiles for any user groups that we wish to provision from. If a user who is not a member of a listed Group profile provisions a VM, the .missing profile will be used (see Provisioning profiles).
Figure 1. Provisioning profiles
Schema
The provisioning profile schema contains a number of attributes, relationships and methods (see The name and value fields in the profile schema).

Figure 2. The name and value fields in the profile schema
Each of these is selected using a message, and the attributes are propagated up to $evm.root in the provisioning operation using collect (see The collect and message fields in the profile schema).
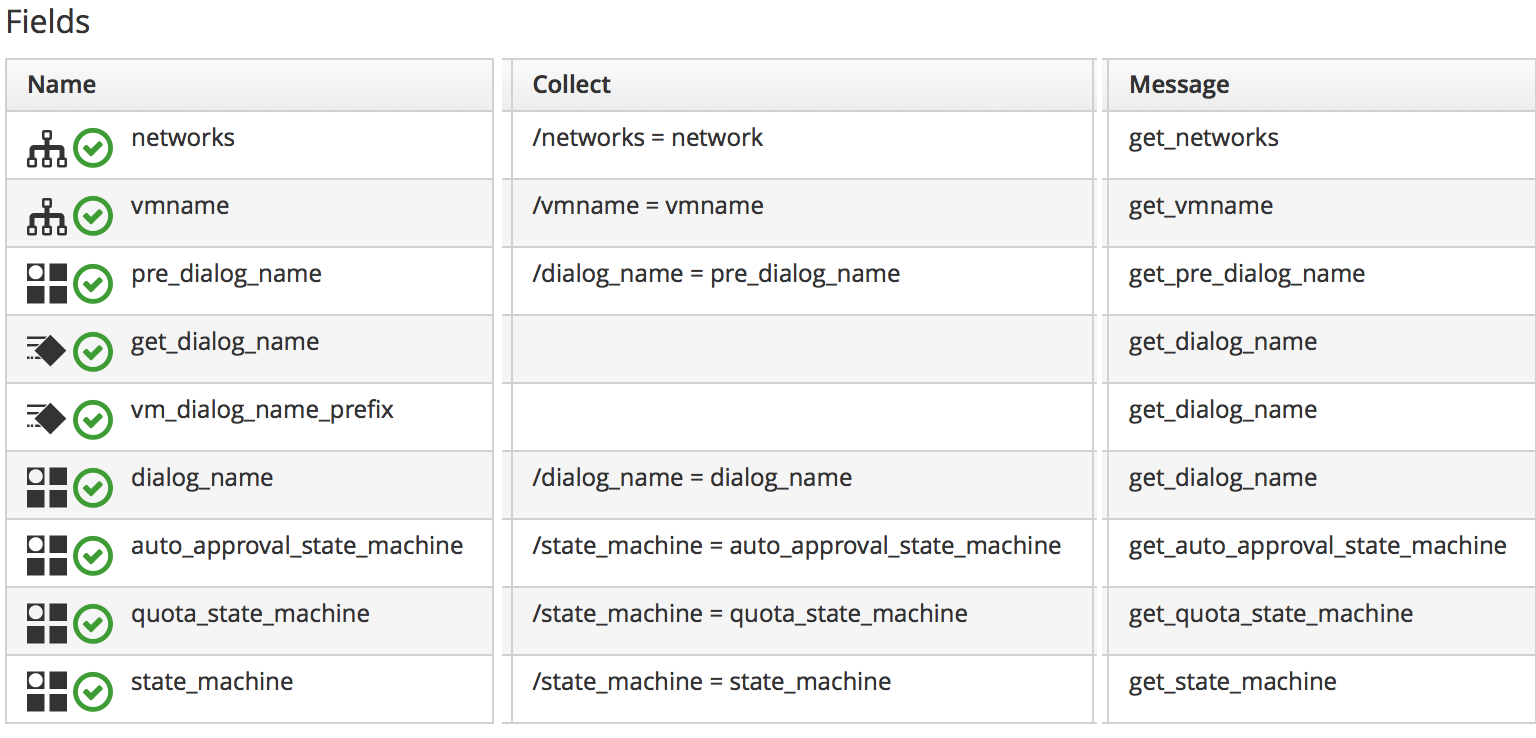
Figure 3. The collect and message fields in the profile schema
Customising the Profile
The profile is designed to be user-customisable, and in fact we frequently add profiles for specific user groups, or edit the .missing profile to cater for updated VM naming methods, or modified provisioning dialogs.
Profile Processing in Detail
Let’s take a detailed look at how we use the group provisioning profile when provisioning a virtual machine.
The Provisioning Dialog
The first profile query is performed as soon as the requesting user selects a template to provision from, and clicks the Continue button. The WebUI must launch the correct provisioning dialog for the target platform, operation type, and (optionally) the user group, and it determines this information from the profile.
The provisioning dialog presents the main set of tabs and elements that prompt us for all the information that we need to provision the VM: VM name, number of CPUs, VLAN, and so on (see The provisioning dialog).
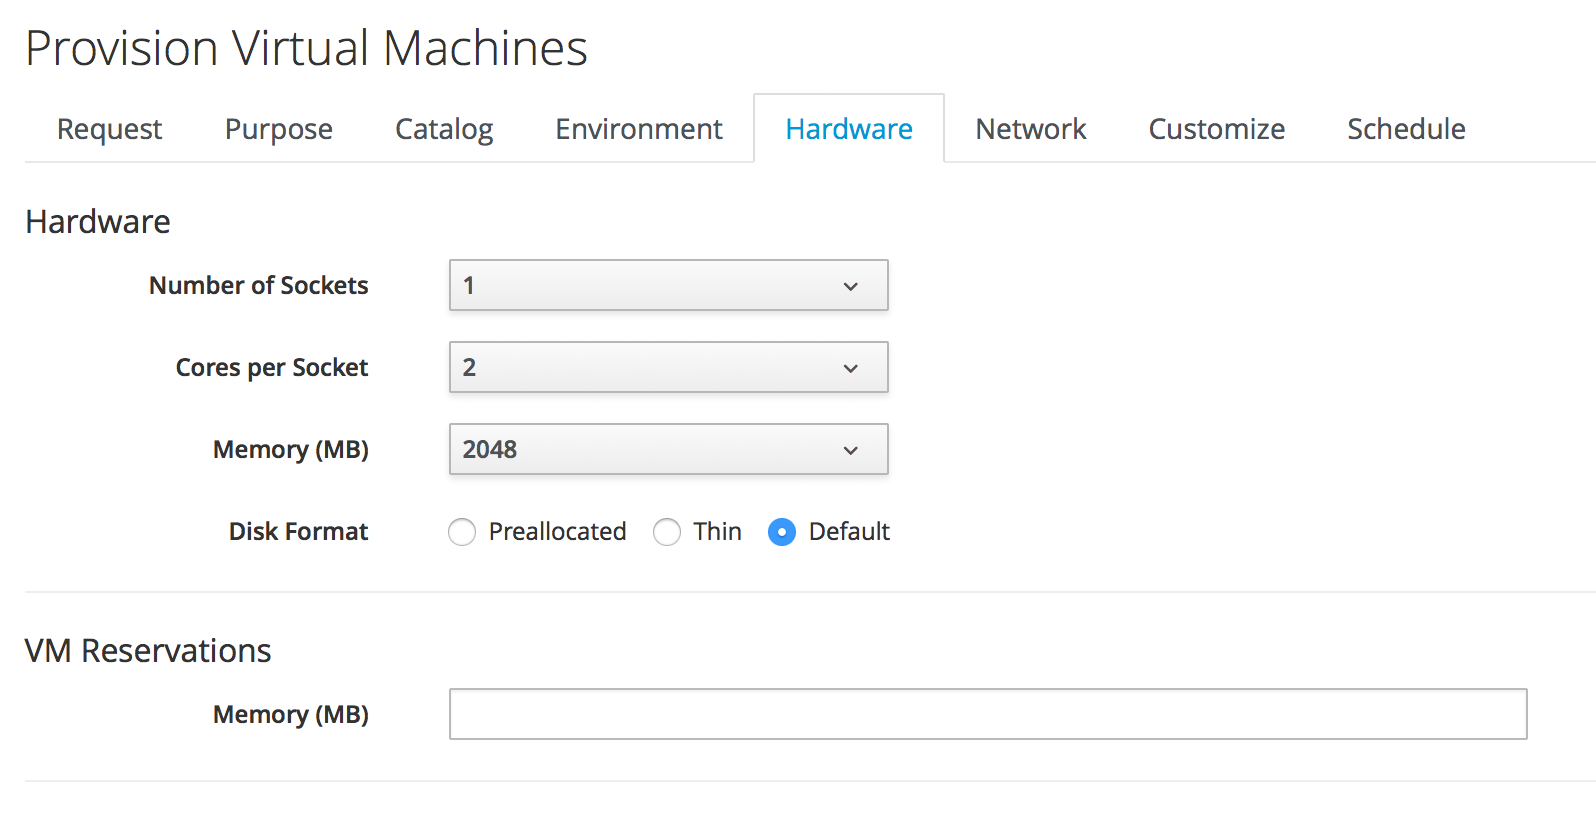
Figure 4. The provisioning dialog
To find the correct provisioning dialog to launch when we select a template and click the Continue button, the profile instance is launched using the messages get_pre_dialog_name and get_dialog_name. This action queries the pre_dialog_name and dialog_name attributes, and runs the vm_dialog_name_prefix method. The dialog name to load is assembled from the run-time substitution of the variables in the string "${#dialog_name_prefix}_${/#dialog_input_request_type}".
|
Note
|
The profile querying at this stage is performed by the internal Rails class MiqRequestWorkflow, rather than by a method that we can see in the Automation Datastore |
We can see the output in evm.log:
...Querying Automate Profile for dialog name
...Invoking [inline] method [.../Profile/vm_dialog_name_prefix] with inputs [{}]
...vm_dialog_name_prefix> Detected Platform:<redhat>
...vm_dialog_name_prefix> Platform:<redhat> \
                                dialog_name_prefix:<miq_provision_redhat_dialogs>
...
...Loading dialogs <miq_provision_redhat_dialogs_template> for user <admin>
VM Name (Pass 1)
The profile is queried using the message get_vmname to retrieve the instance URI to be used to formulate the name of the VM to be provisioned. The VM name is saved as the collect variable vmname.
This VM name is then inserted into the text string that will form the request object’s description attribute (miq_provision_request.description), for example "Provision from [rhel7-generic] to [rhel7srv004]".
If we are provisioning two or more VMs in a single request and letting Automate handle the VM auto number incrementing (e.g. rhel7srv005, rhel7srv006… etc) then the request object description is more generic, for example "Provision from [rhel7-generic] to [rhel7srvxxx]".
Approval
Once the request object is created, we begin a series of event-driven processing steps based on instances in /System/Policy (see MiqProvision-Related Policy Instances).
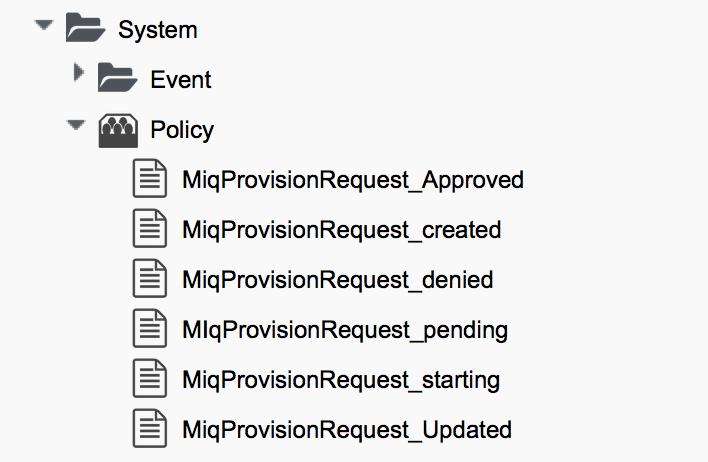
Figure 5. MiqProvision-Related Policy Instances
The first of these to be triggered is MiqProvisionRequest_created. This contains two relationships, the first of which queries the profile using the message get_auto_approval_state_machine to retrieve the state machine name to be used to handle the auto-approval process. The second relationship runs the Default instance of this state machine.
Approved, Pending or Denied
Depending on the outcome of the approval process (approved, pending or denied), an email is sent to the requester by the corresponding event/policy instance.
Quota
The next event-driven policy instance to be triggered is MiqProvisionRequest_starting. This policy instance just contains a single relationship to the /System/CommonMethods/QuotaStateMchine/quota state machine.
Once quota has been checked and passed, the request continues processing, and the task objects are created.
VM Name (Pass 2)
The profile is again queried using the message get_vmname to retrieve the instance URI to be used to formulate the name of the VM to be provisioned. This second call is made while processing the provisioning request as part of the creation of the tasks that will handle the provisioning of each VM in the request. The VM name is saved as the collect variable vmname.
The derived VM name is added to the task object’s options hash as miq_provision.options[:vm_target_name] and miq_provision.options[:vm_target_hostname]. This is performed once per task object (there may be several task objects created for a single request object).
VM Provisioning State Machine
Finally the profile is used by the provisioning task to determine the state machine instance to be used to provision the VM. A call is made to /Infrastructure/VM/Lifecycle/Provisioning#create.
This instance contains two relationships, the first is /Infrastructure/VM/Provisioning/Profile/${/#user.normalized_ldap_group}#get_state_machine. This queries the profile using the message get_state_machine to retrieve the state machine class name to be used to handle the provisioning of the VM. The state machine class name is saved as the collect variable state_machine.
The second relationship is /Infrastructure/VM/Provisioning/StateMachines/${/#state_machine}/${/#miq_provision.provision_type}. This uses the state_machine variable retrieved from collect in the previous relationship, and runs the instance of this state machine whose name corresponds to a variable substitution for miq_provision.provision_type. When performing a VM clone from template (the most common VM provision operation), this will be "template".
Summary
In this chapter we have seen how the access control group-specific selections are made as part of the virtual machine provisioning automation workflow. The provisioning profiles allow us considerable flexibility in customising the workflow to take into account group-specific choices that we might wish to make.
The concept of using a group profile to hold group-specific options is not limited to virtual machine provisioning. It is also used for service provisioning, and we create a group profile to handle our automation request approval workflow in Automation Request Approval.