Creating a Service Catalog Bundle
We learnt in Creating a Service Catalog Item how to create service catalog items that enable our users to provision fully configured virtual machines from a single Order button.
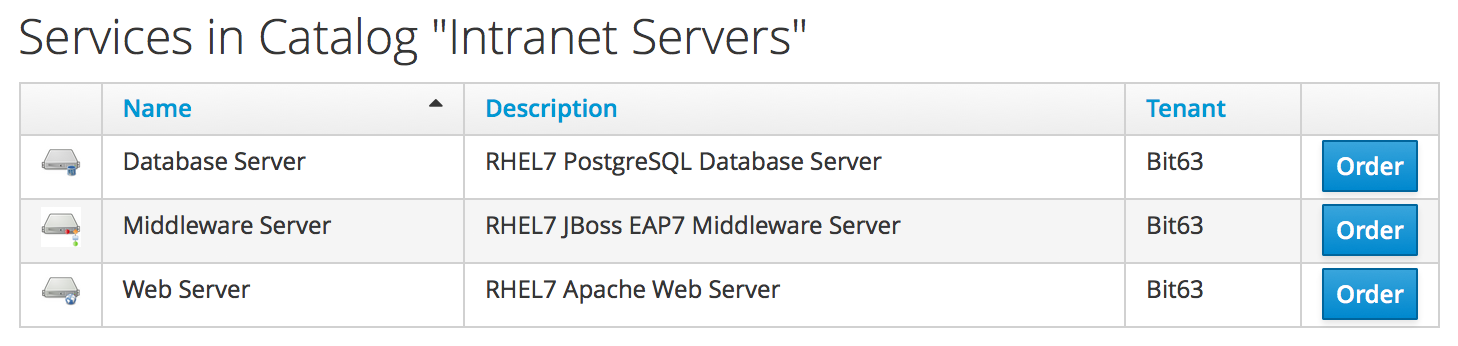
We can populate our service catalog with useful items (see Service catalog containing three services).
Figure 1. Service catalog containing three services
In these examples the virtual machines are provisioned from fully installed VMware templates, preconfigured with the application packages. The service dialog purely prompts for the Service and VM Names (see Service dialog for each catalog item).
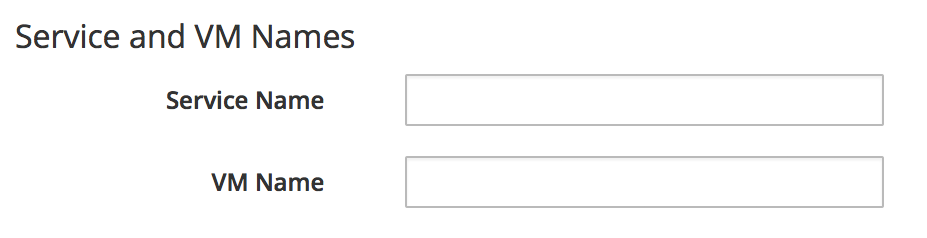
Figure 2. Service dialog for each catalog item
The next logical step is to be able to provision several items together as a single service catalog bundle.
Creating the Service Dialog for the Bundle
When we create a service catalog bundle, we handle the dialog input for each of the catalog items in a single service dialog that we create for the bundle. For our Web, Middleware and Database Server items, we must prompt for the VM name of each, but we’ll also prompt for a service name (see Service dialog for a catalog bundle).
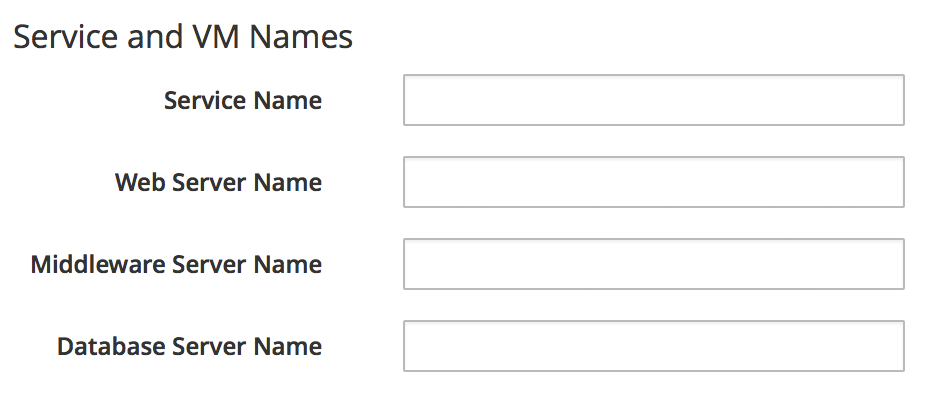
Figure 3. Service dialog for a catalog bundle
We name the dialog elements according to the sequence in which we want our individual items provisioned. Our sequence will be:
-
Database Server
-
Middleware Server
-
Web Server
Our four dialog elements are therefore constructed as follows. We’ll create a text box element to prompt for Service Name (see Dialog element to prompt for service name).
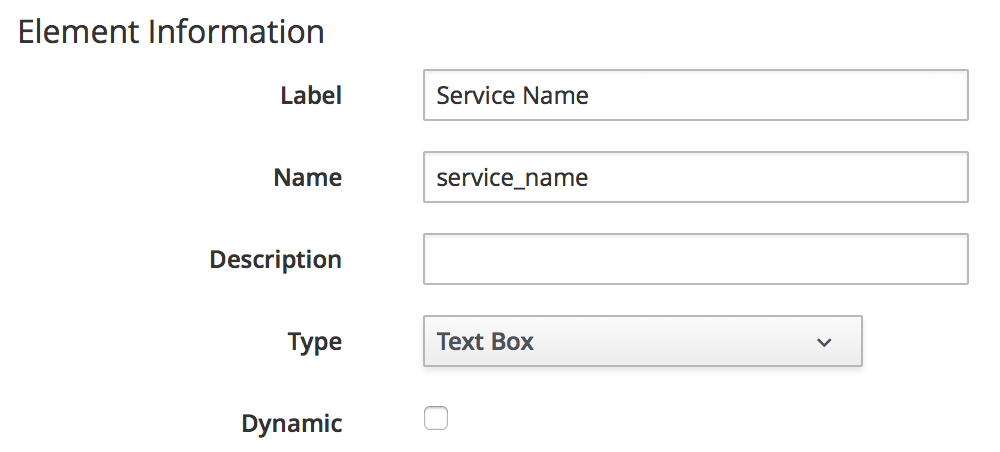
Figure 4. Dialog element to prompt for service name
We add a second text box element to prompt for Web Server Name (see Dialog element to prompt for web server name).
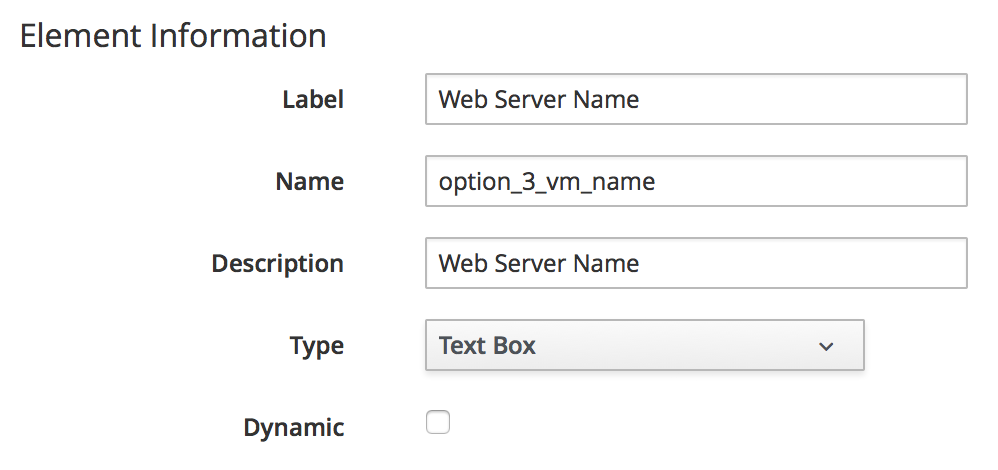
Figure 5. Dialog element to prompt for web server name
We add a third text box element to prompt for Middleware Server Name (see Dialog element to prompt for middleware server name).
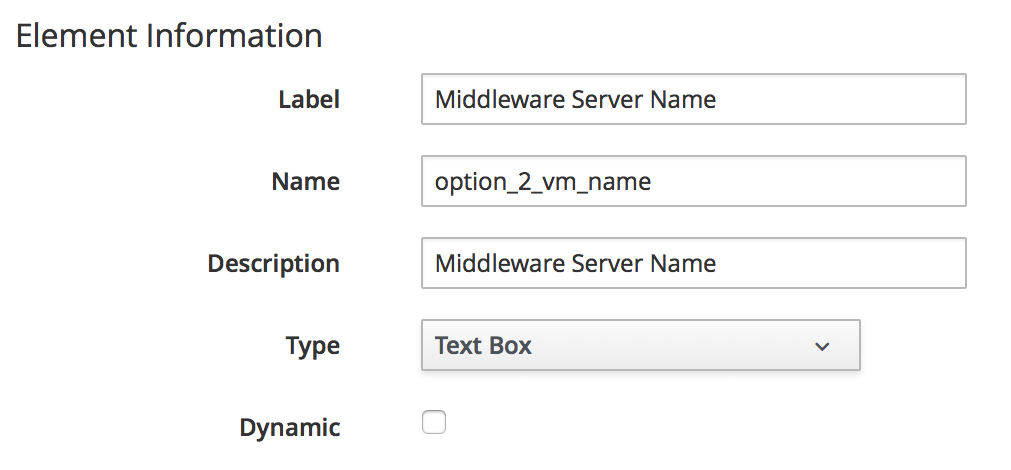
Figure 6. Dialog element to prompt for middleware server name
Finally we add a fourth text box element to prompt for Database Server Name (see Dialog element to prompt for database server name).
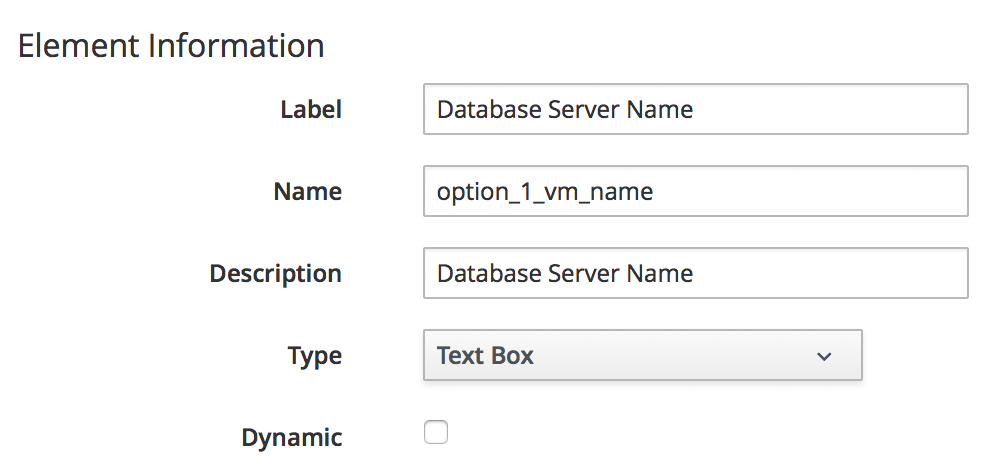
Figure 7. Dialog element to prompt for database server name
The number in the element name reflects the sequence number, and the CatalogItemInitialization and CatalogBundleInitialization methods use this sequence number to pass the dialog value to the correct grandchild miq_request_task (see The Service Provisioning State Machine).
The value option_<n>_vm_name is recognised and special-cased by CatalogItemInitialization, which sets both the :vm_target_name and :vm_target_hostname keys in the miq_request_task’s options hash to the value input.
The :vm_target_name key sets the name of the resulting virtual machine.
The :vm_target_hostname key can be used to inject a Linux hostname (i.e. FQDN) into a VMware Customization Specification, which can then set this in the virtual machine using VMware Tools on firstboot.
Preparing the Service Catalog Items
As we will be handling dialog input when the bundle is ordered, we need to edit each catalog item to set the Catalog to <Unassigned>, and the Dialog to <No Dialog>. We also deselect the Display in Catalog option as we no longer want this item to be individually orderable (see Preparing the existing service catalog items).
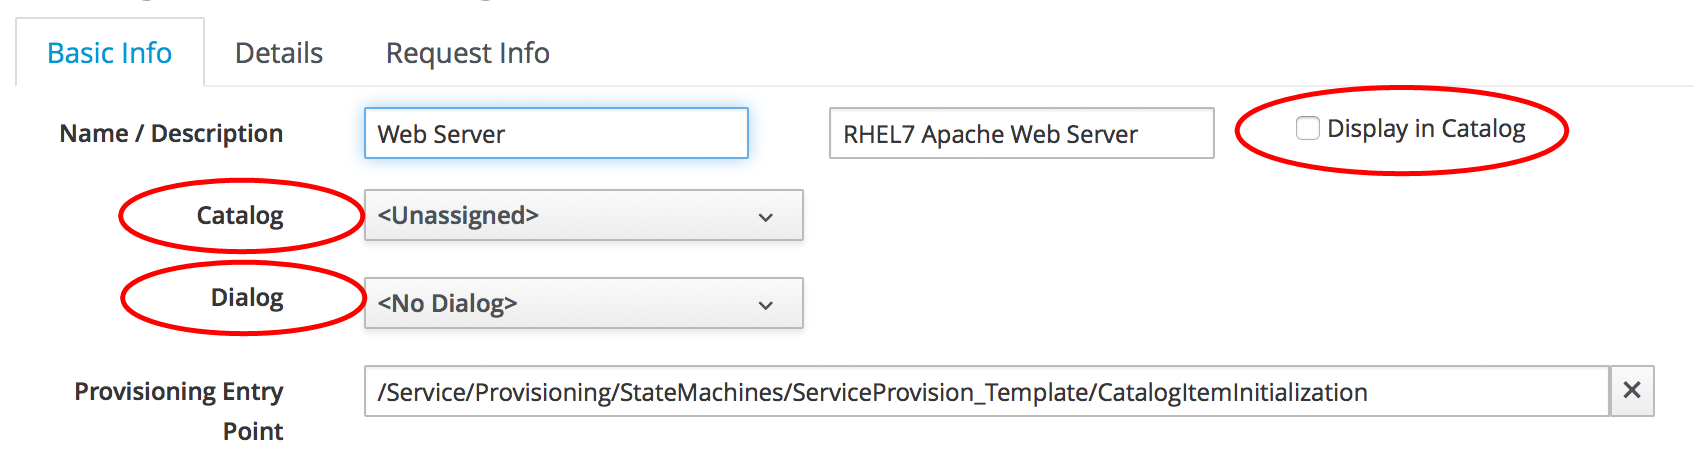
Figure 8. Preparing the existing service catalog items
Once we’ve done this, the items will appear as Unassigned (see Unassigned catalog items).
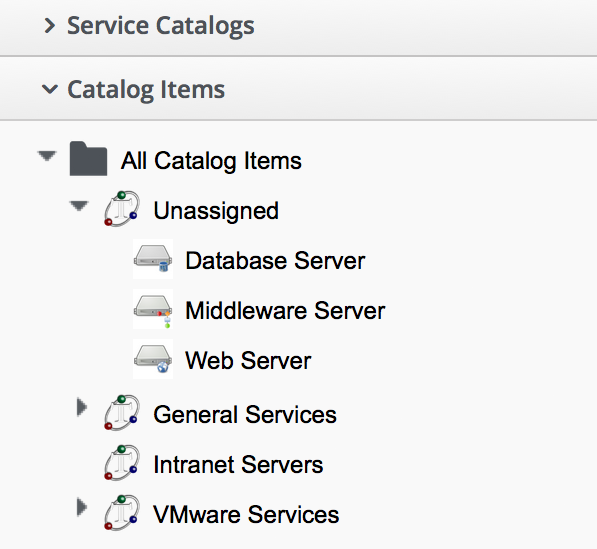
Figure 9. Unassigned catalog items
Creating the Service Catalog Bundle
Now we can go ahead and create our catalog bundle. Highlight a catalog name, and select Configuration → Add a New Catalog Bundle (see Adding a new catalog bundle).
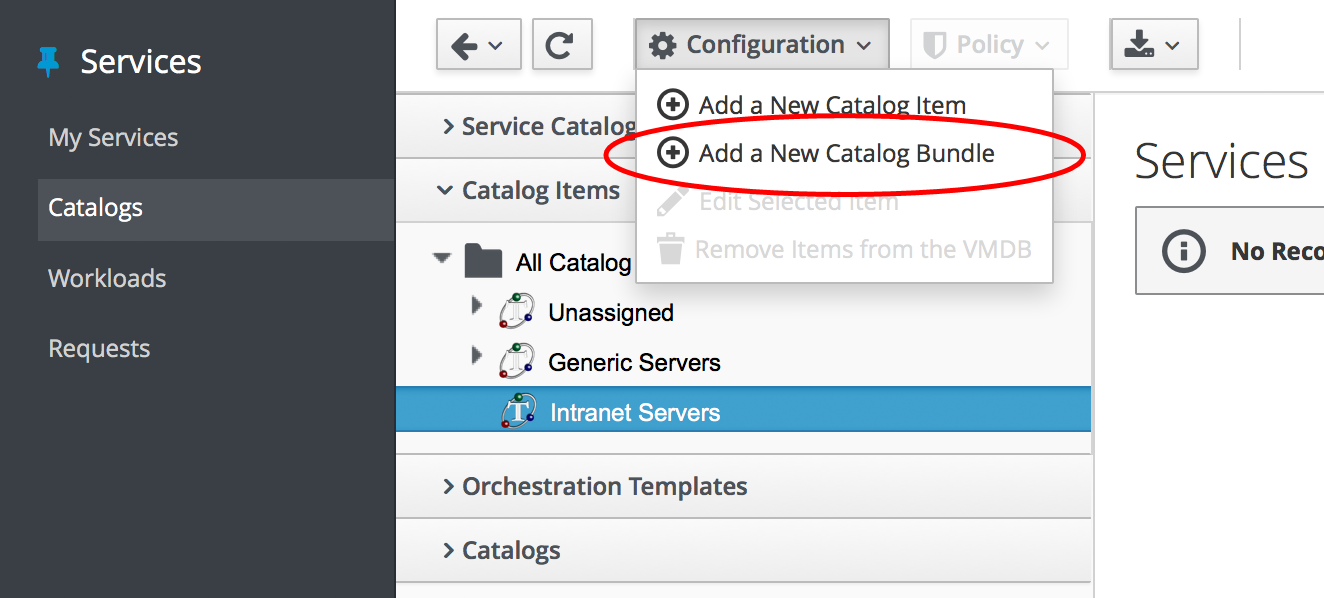
Figure 10. Adding a new catalog bundle
Enter a name and description for the bundle, then select the Display in Catalog checkbox. Select an appropriate catalog, and the newly created bundle dialog, from the appropriate drop-downs.
For the Provisioning Entry Point, navigate to ManageIQ/Service/Provisioning/StateMachines/ServiceProvision_Template/CatalogBundleInitialization (see Service bundle basic info).
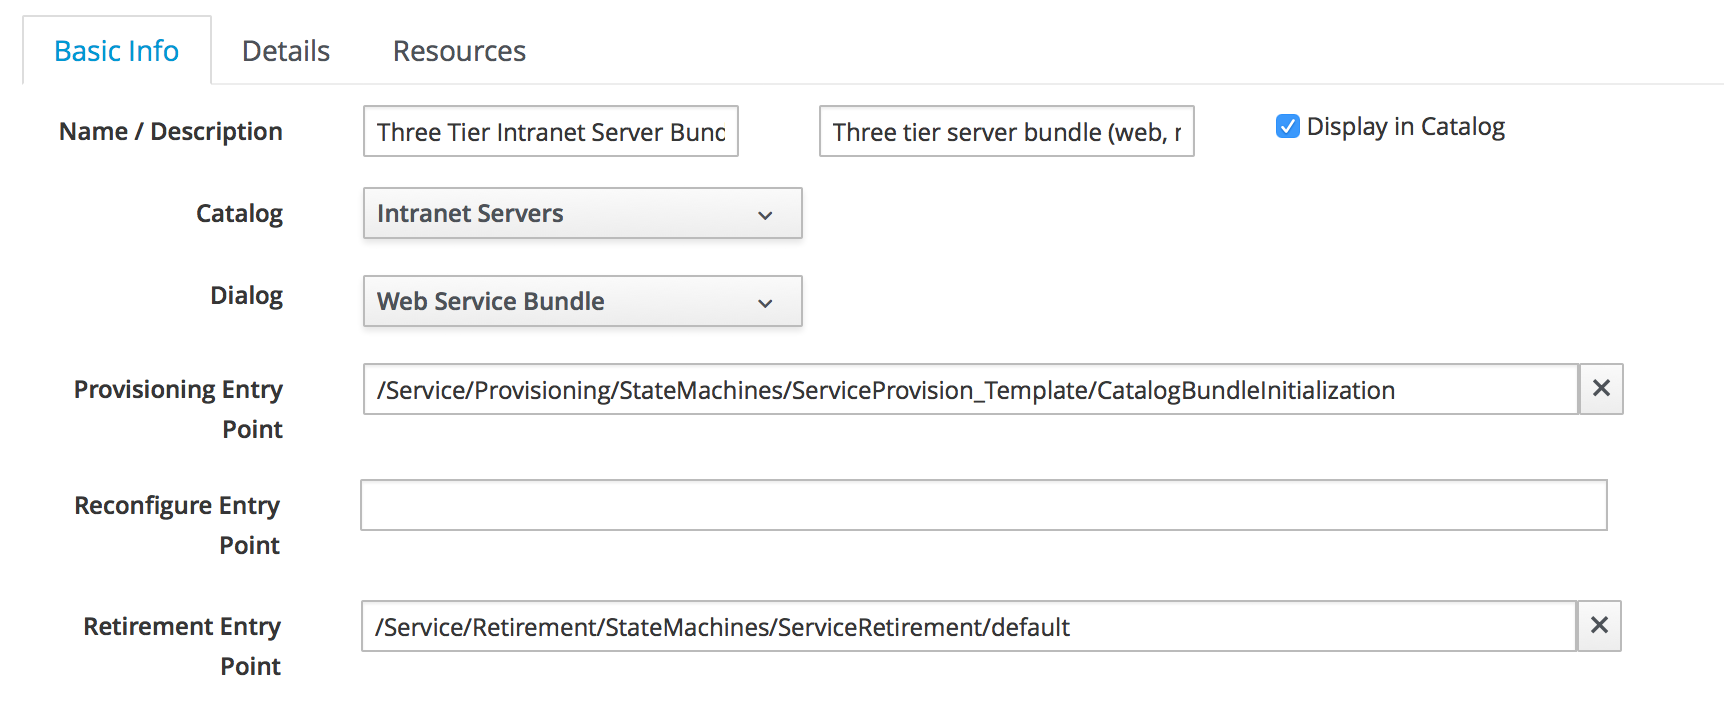
Figure 11. Service bundle basic info
Click on the Details tab, and enter some HTML-formatted text to describe the catalog item to anyone viewing in the catalog.
<h1>Three Tier Intranet Server Bundle</h1>
<hr>
<p>Deploy a <strong>Web, Middleware</strong> and <strong>Database</strong>
                 server together as a single service</p>
Click on the Resources tab, and select each of the three unassigned catalog items to add them to the bundle (see Adding resources to the bundle).
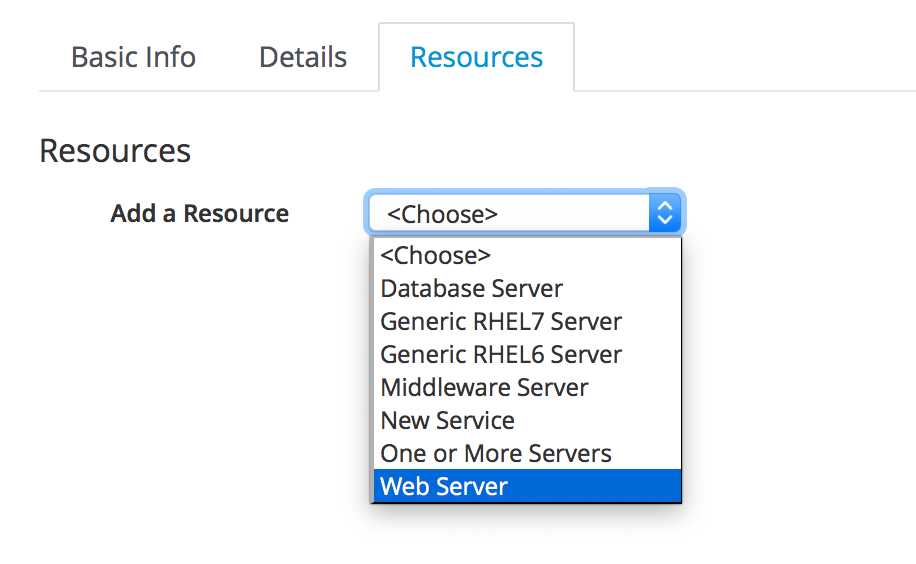
Figure 12. Adding resources to the bundle
Change the Action Order and Provisioning Order according to our desired sequence ('3' won’t be visible until '2' is set for an option) see Setting the action and provision orders. The sequence should match the option_<n>_vm_name sequence that we gave our dialog elements.

Figure 13. Setting the action and provision orders
Finally click the Add button.
Select a suitable sized icon for a custom image, and save.
Ordering the Catalog Bundle
Navigate to the Service Catalogs section in the accordion, expand the Intranet Services catalog, and highlight the Three Tier Intranet Server Bundle catalog item (see Ordering the catalog bundle).

Figure 14. Ordering the catalog bundle
Click Order, and fill out the service dialog values (see Entering the service and server names in the service dialog).
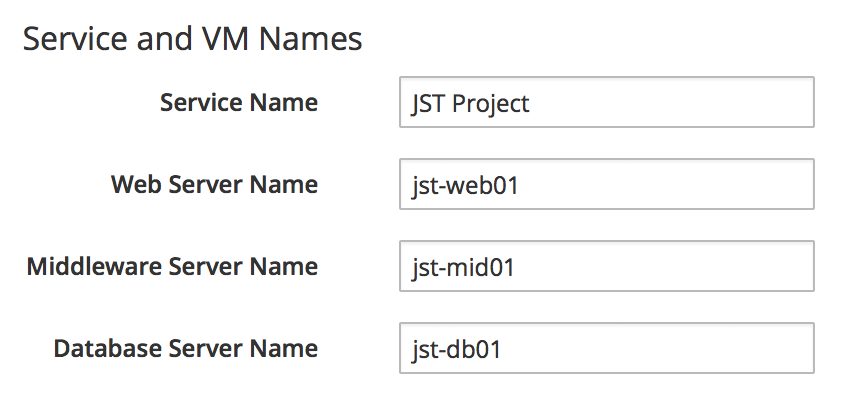
Figure 15. Entering the service and server names in the service dialog
Click Submit
After a new minutes, the new service should be visible in My Services, containing the new VMs (see The completed service).
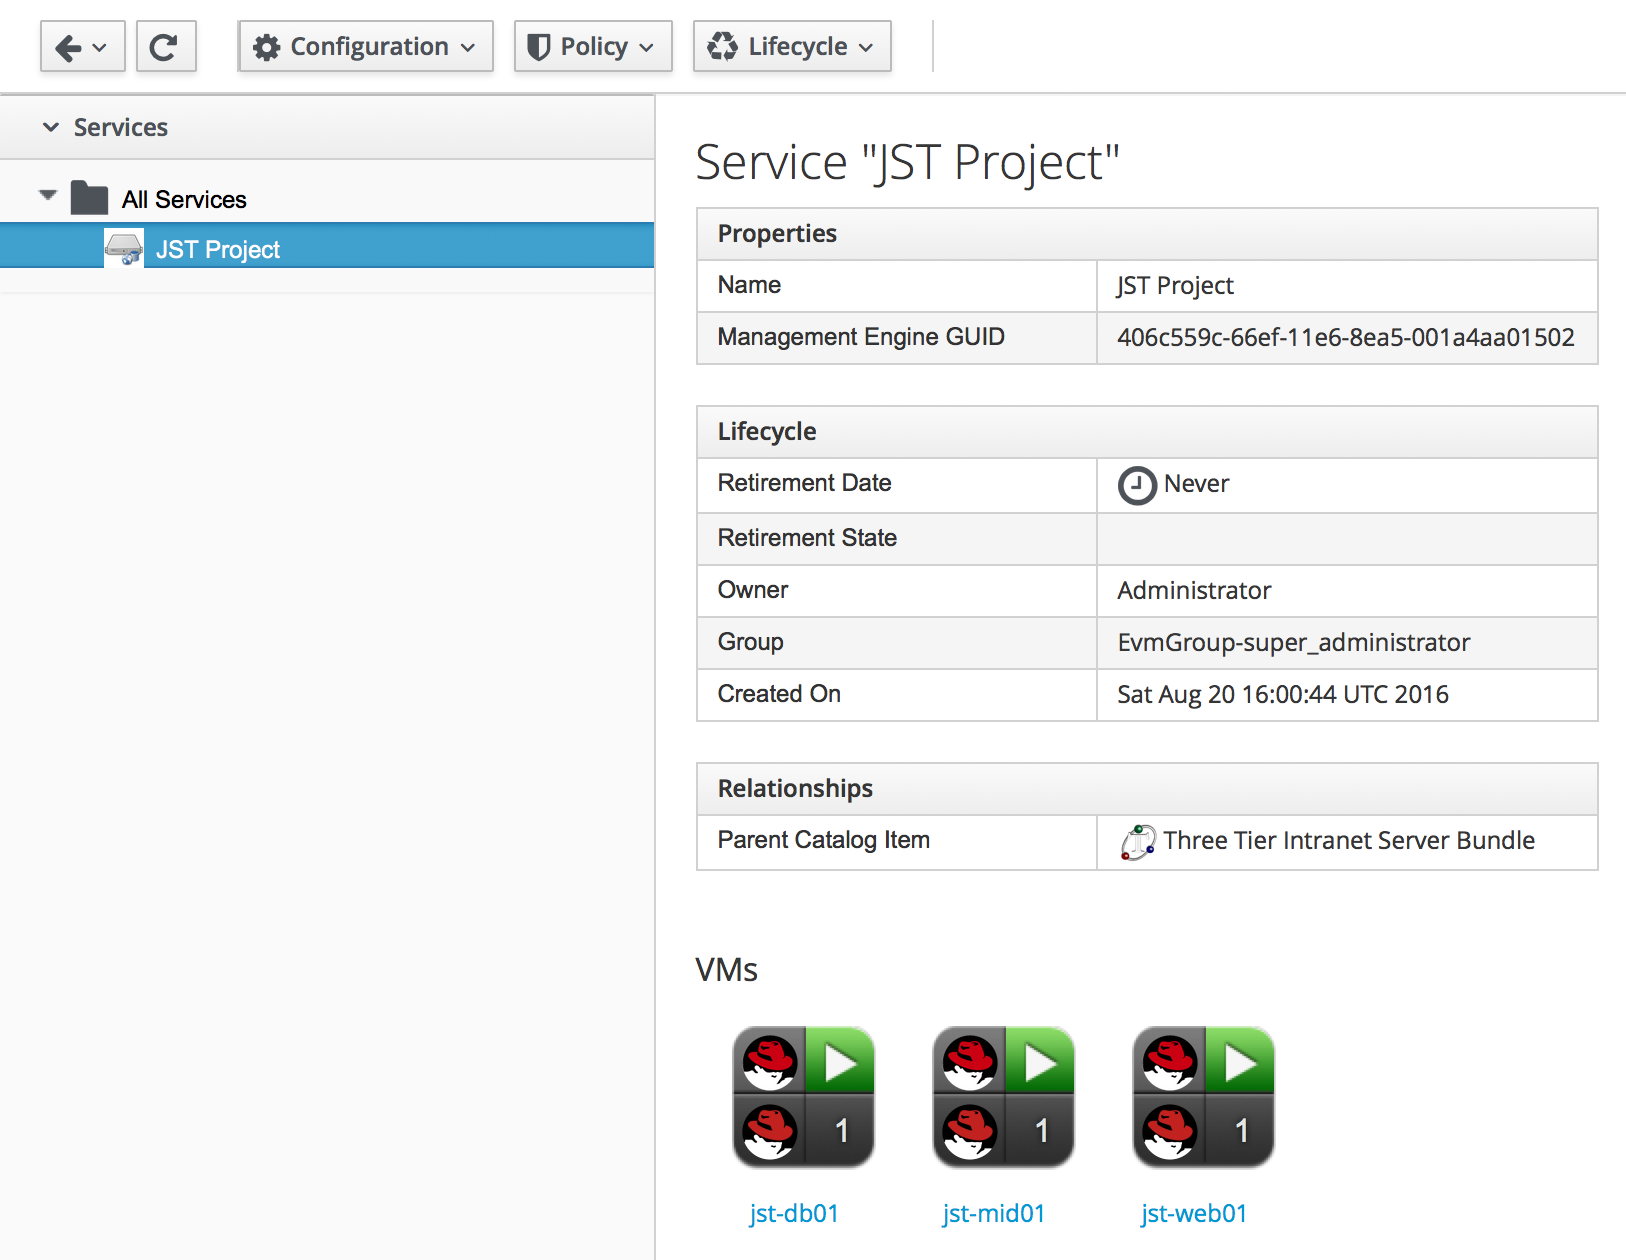
Figure 16. The completed service
If we weren’t watching the order that the VMs were created in, we could look in the database to check that our desired provisioning sequence was followed:
vmdb_production=# select id,name from vms order by id asc;
      id       |                     name
---------------+----------------------------------------------
...
 1000000000177 | jst-db01
 1000000000178 | jst-mid01
 1000000000179 | jst-web01
Here we see that the VMs were created (and named) in the correct order.
Summary
This has been a useful example that shows the flexibility of service catalogs to deploy entire application bundles. When we link this concept to a configuration management tool such as Puppet running from Red Hat Satellite 6, we start to really see the power of automation in our enterprise. We can deploy complex workloads from a single button click.
One of the cool features of service bundles is that we can mix and match catalog items that provision into different providers. For example we may have a Bimodal IT [1] infrastructure comprising RHEV for our traditional Mode 1 workloads, and an in-house OpenStack private cloud for our more cloud-ready Mode 2 workloads. Using service bundles we could provision our relatively static servers into RHEV, and our dynamically scalable mid-tier and frontend servers into OpenStack.